2.7.1. Popup Forms
You can create a pop-up form that opens on a document form, task form, or user dictionary. Through the form, you can get or set attribute values. On the pop-up form, you can place any attributes whose values the user must enter.
2.7.1.1. Create a Pop-up Form
-
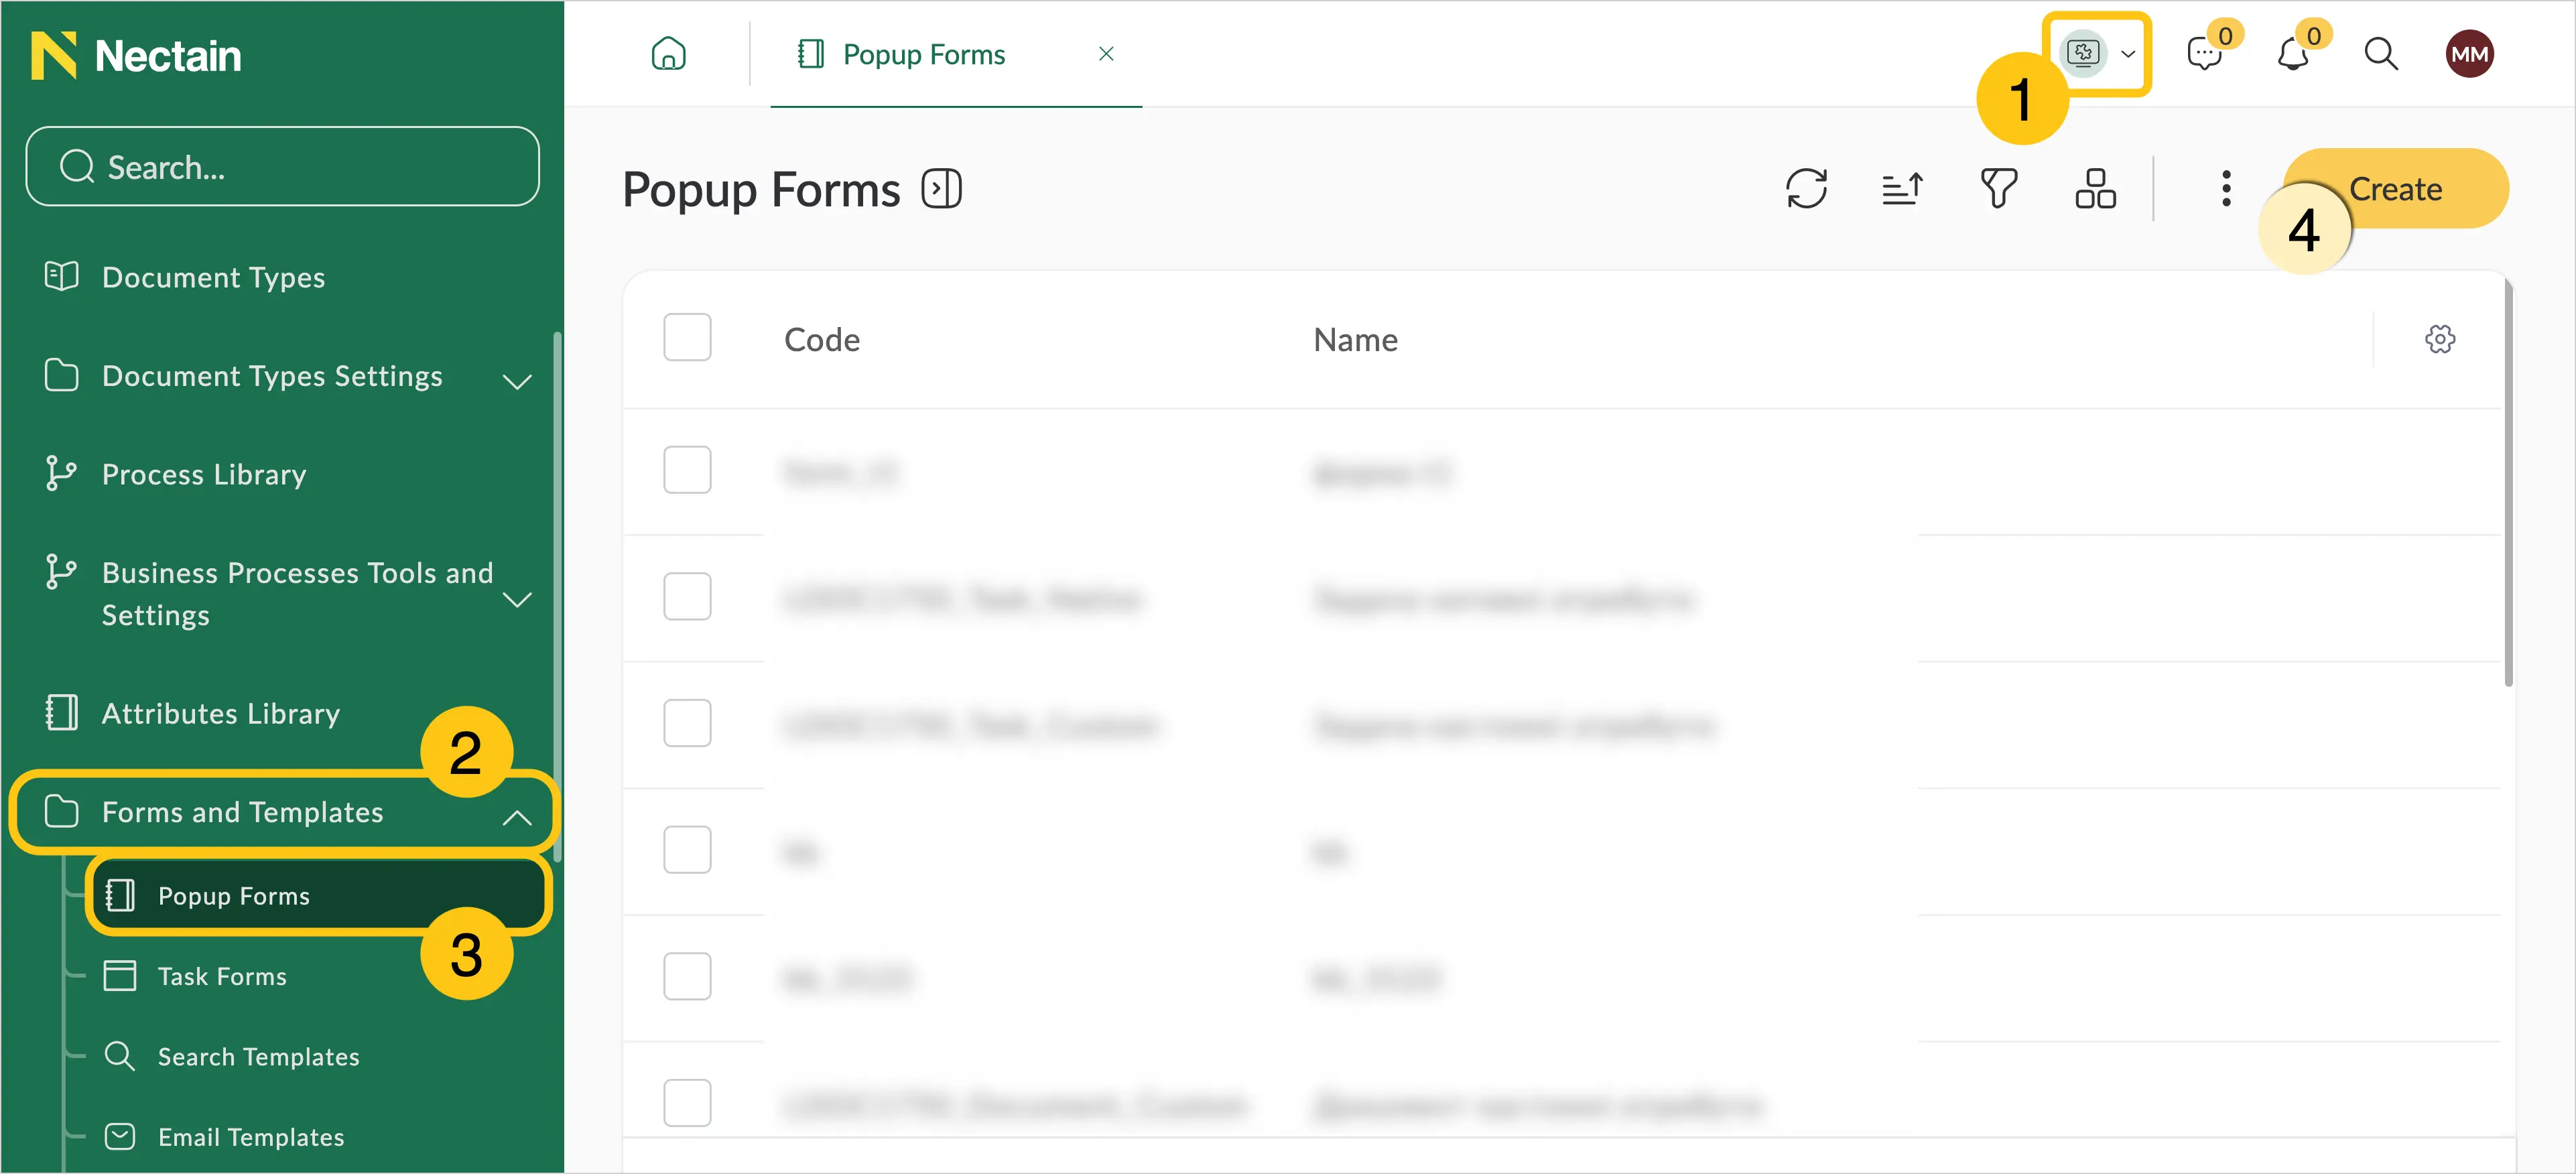
In the navigation panel, select the Studio 1 desktop.
-
Select the Forms and Templates 2 shortcut group, then select Popup Forms 3.
-
In the toolbar, select Create 4.
-
Fill in the fields 1 using the hints in the table below, then in the toolbar select Save 2.
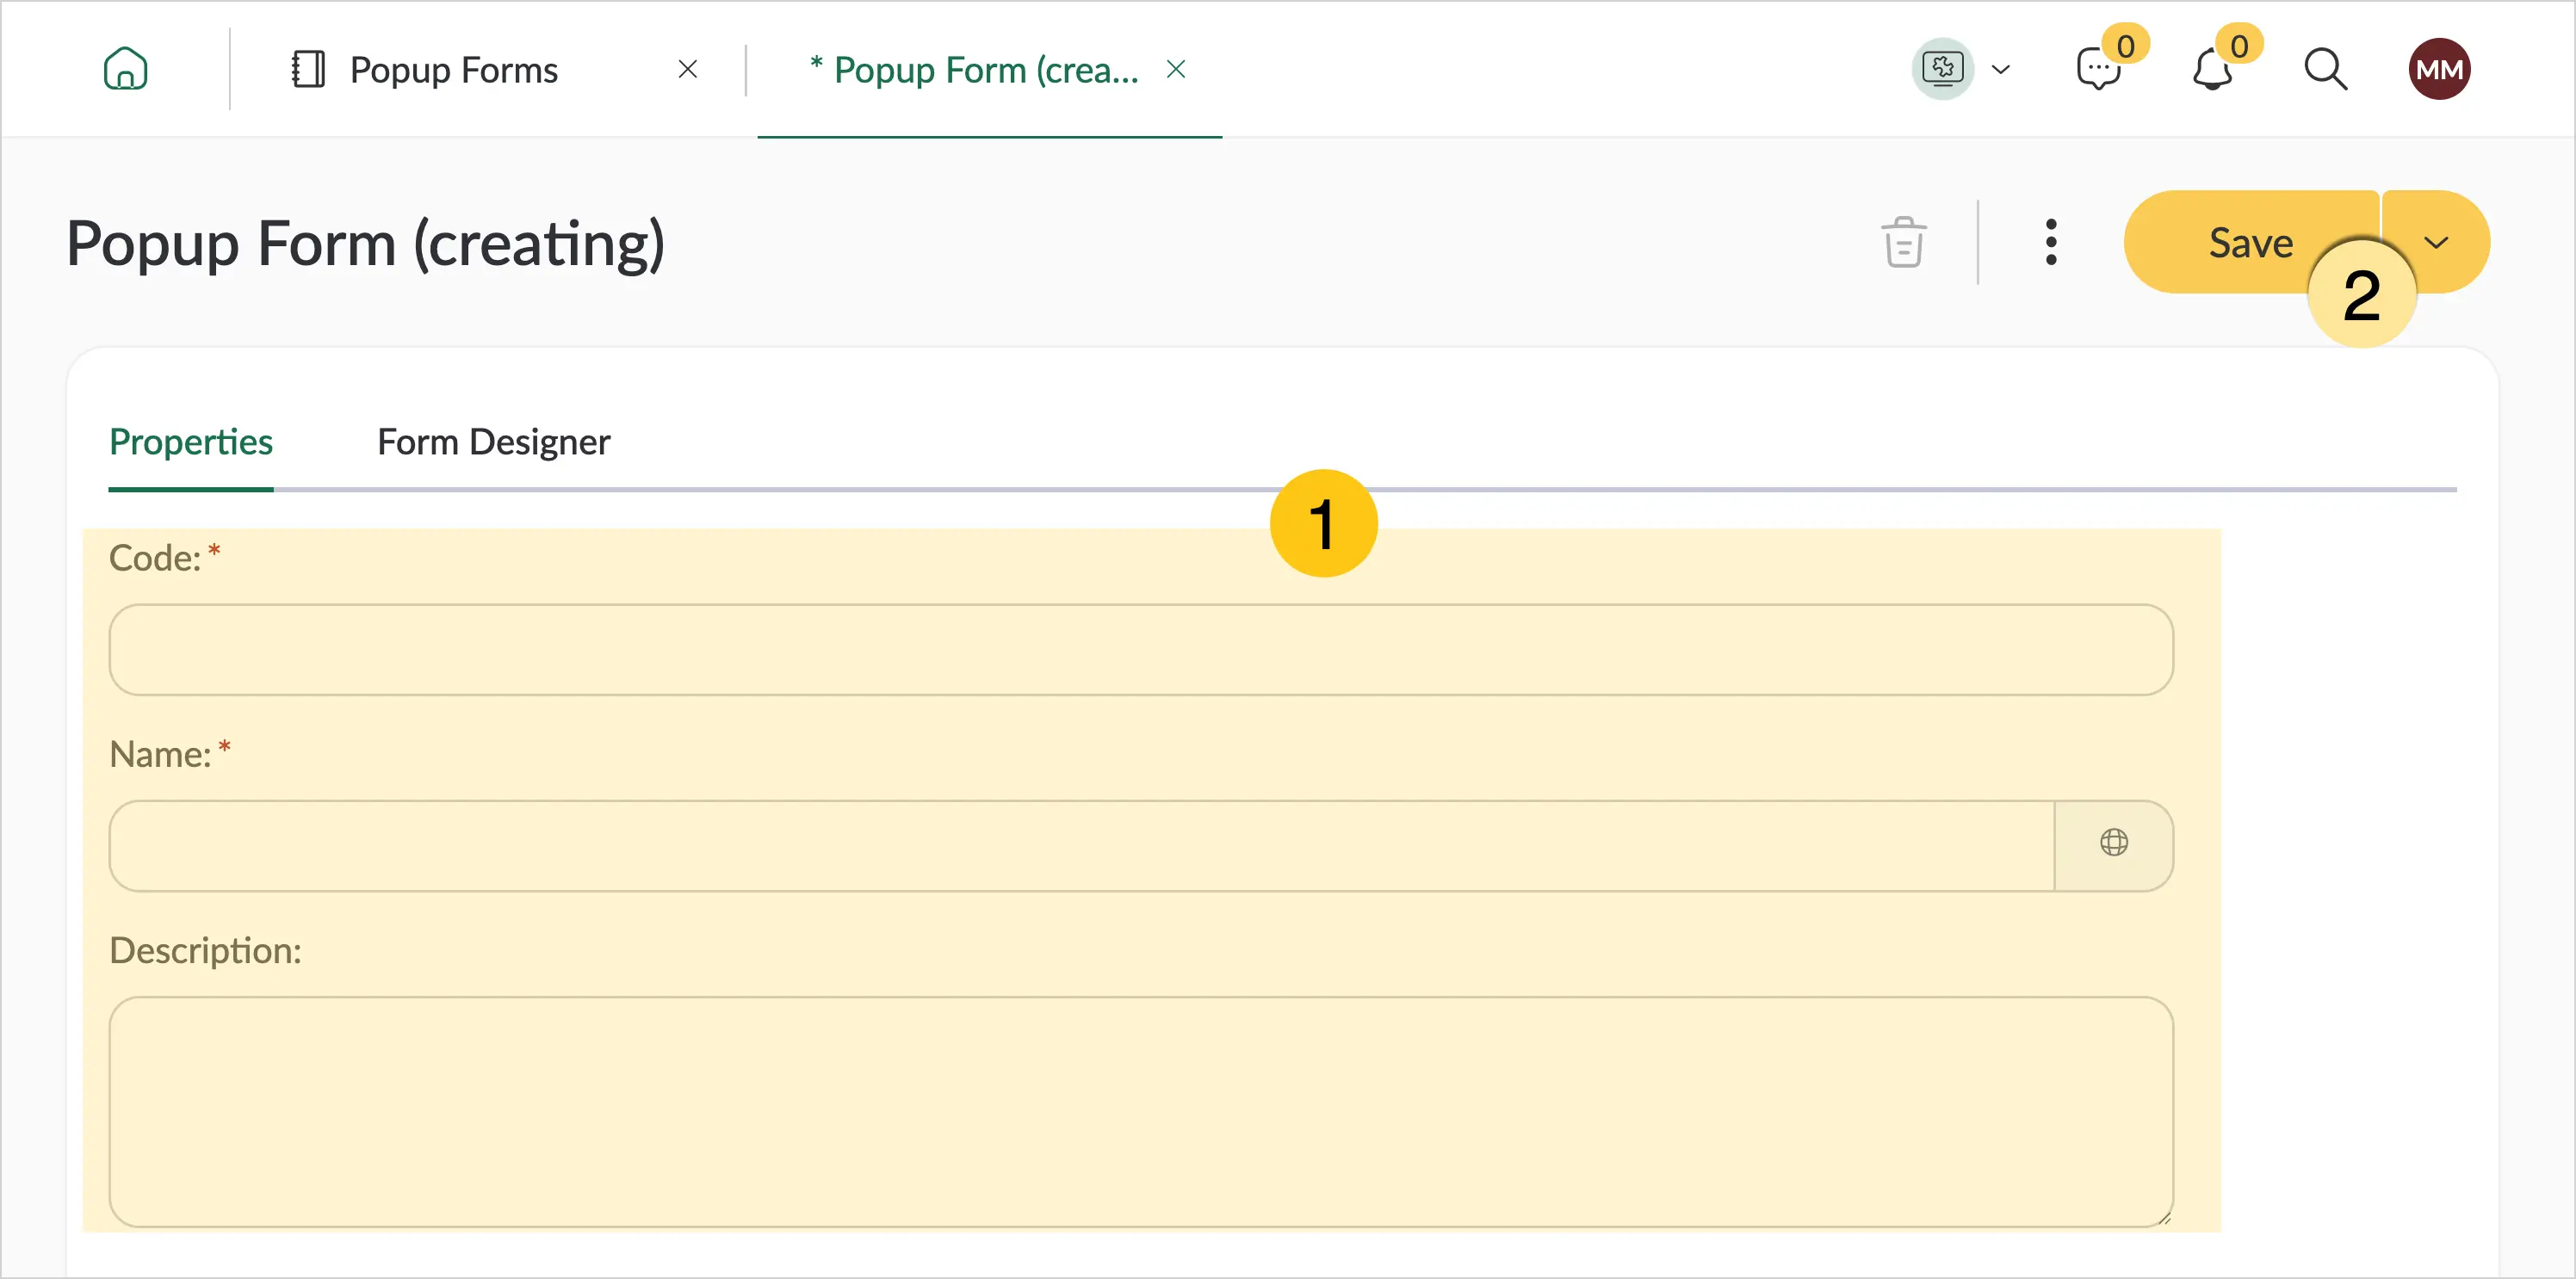
Field name Description Code* Unique identifier of the pop-up form. - The code must be unique.
- The code must be short (typically up to 10 characters).
- Use only Latin letters and digits.
Name* The name of the pop-up form. You can set different names for different localizations. Description A short description of the pop-up form. -
Go to the Form Designer 1 tab.
-
In the Options 2 menu, fill in the fields using the hints in the table below.
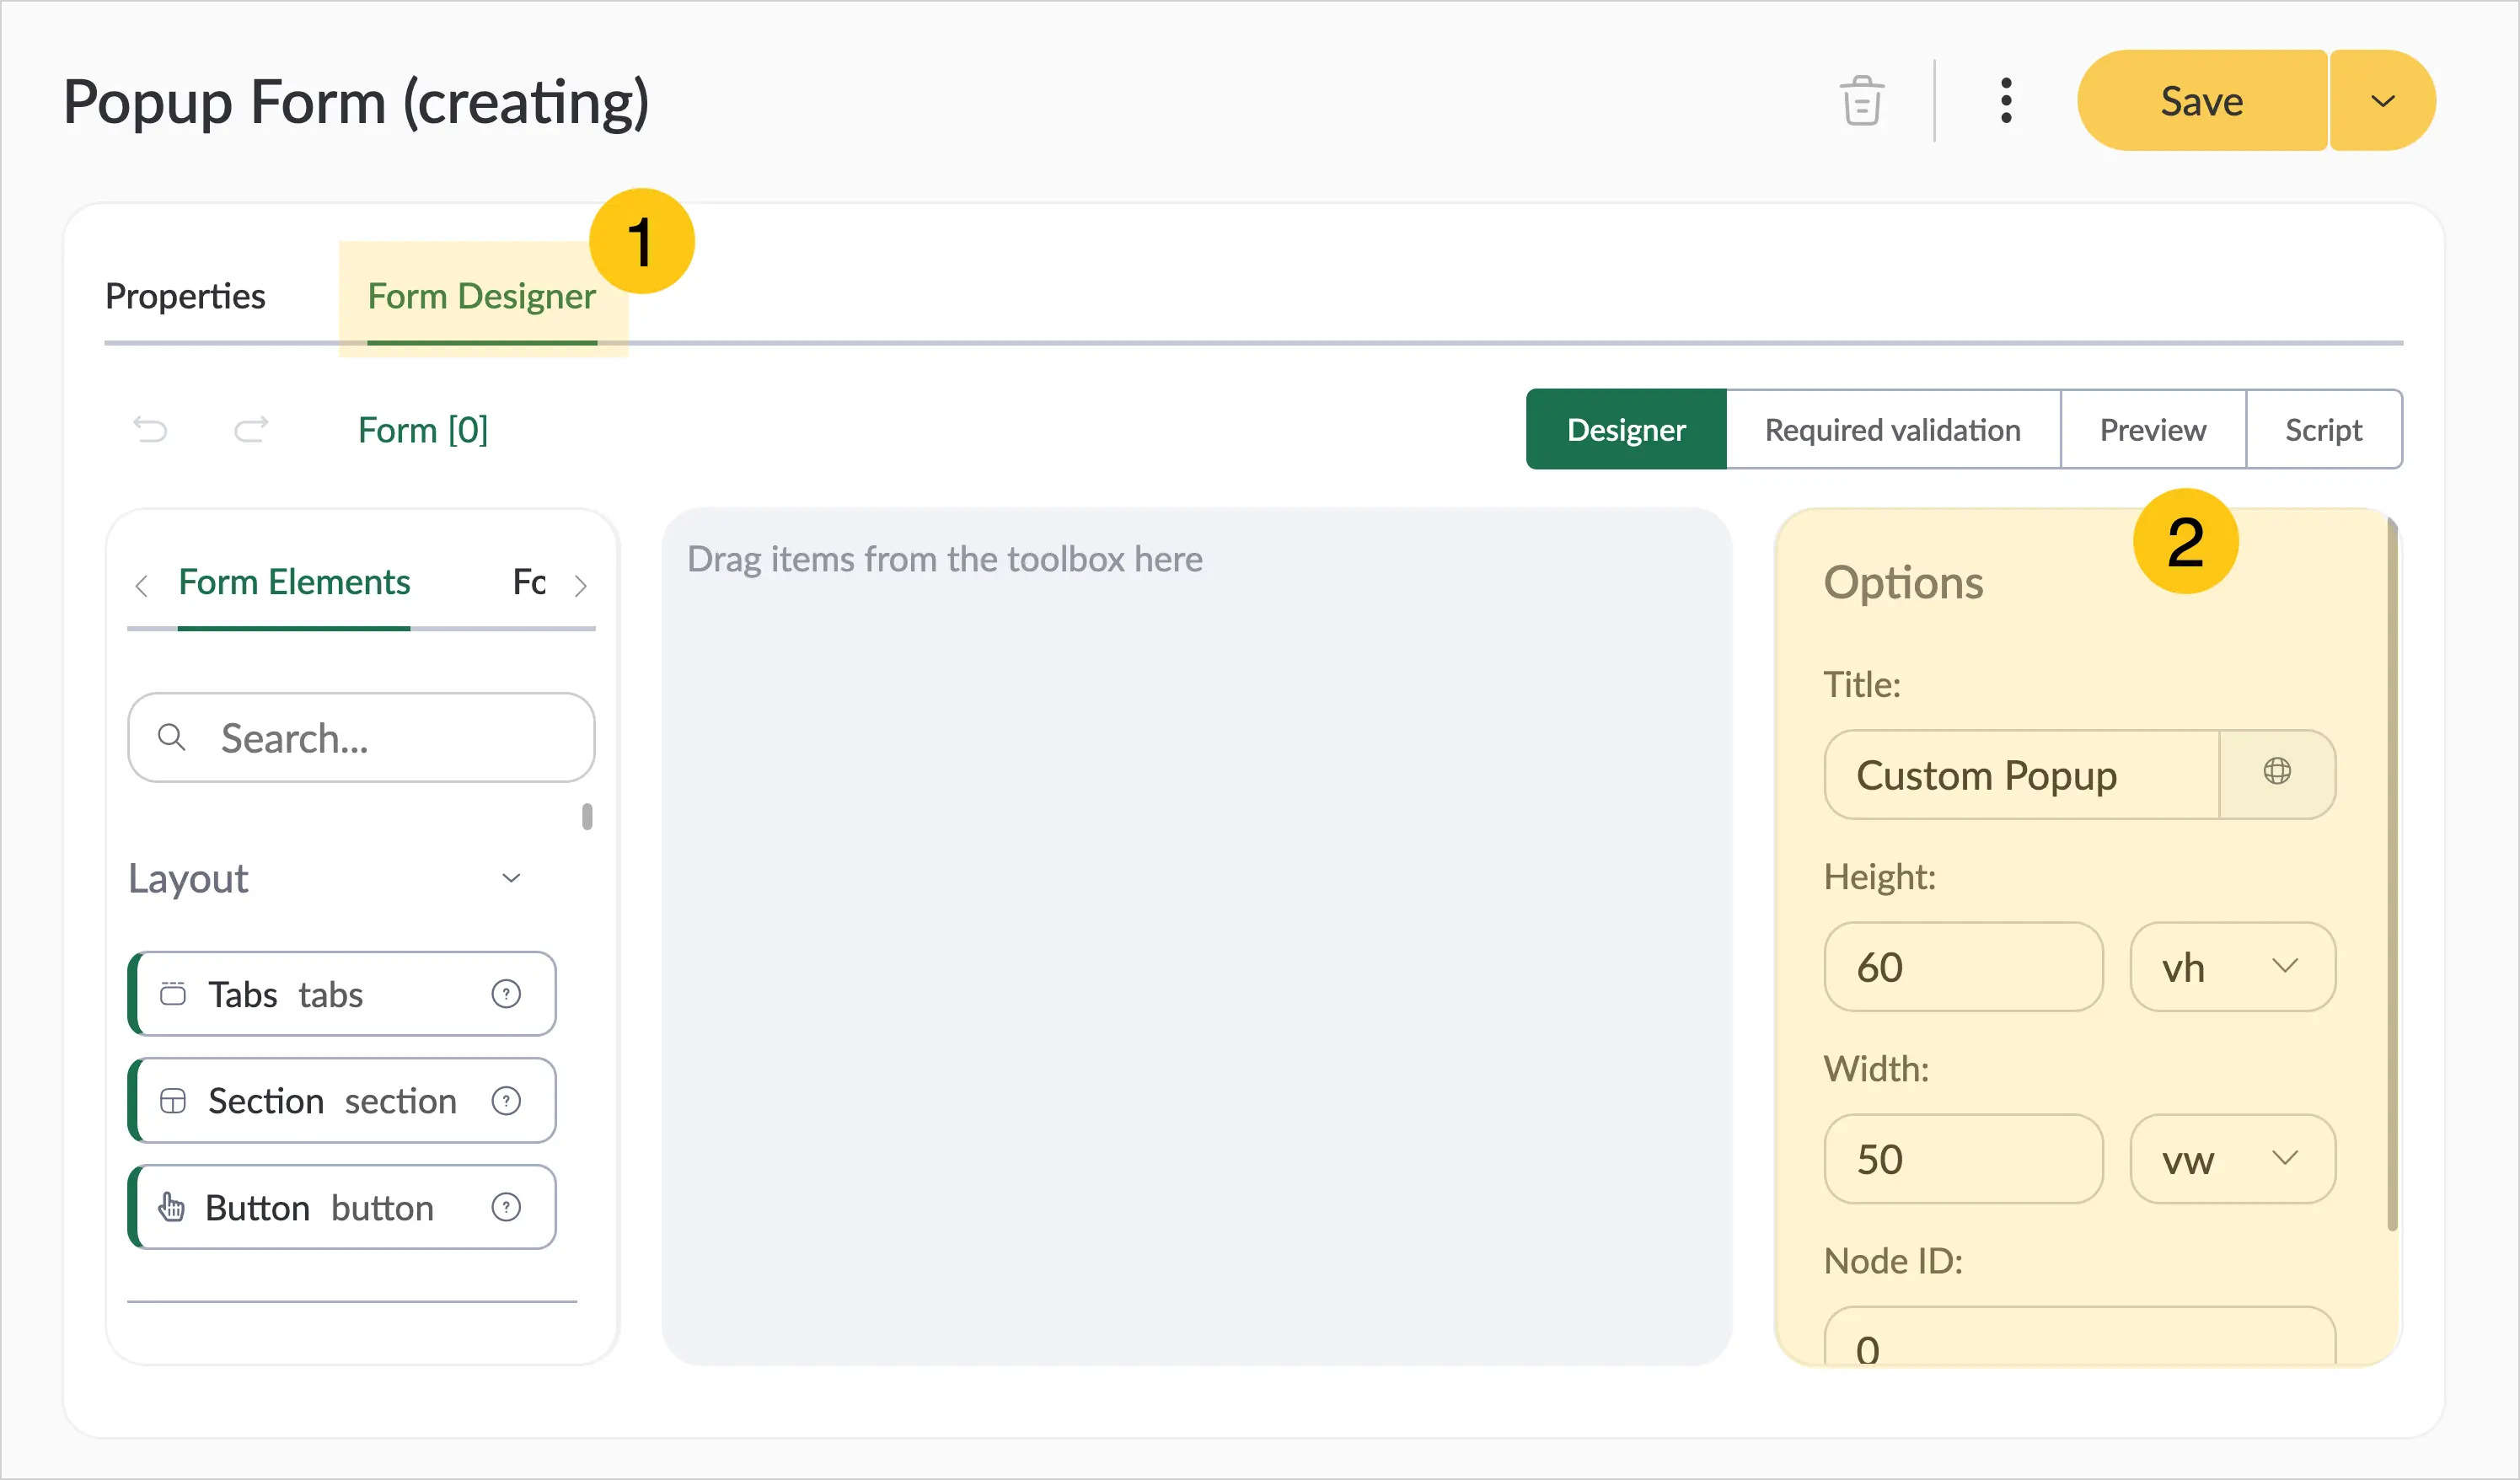
Field name Description Title Enter the text to display in the form header.
ℹ️ Note: You can set alternative titles for different languages. To do this, in the Title field, select the icon and fill in the fields for other languages. Then select the Apply button.Height Select one of the following units of measurement: - auto — the height will be determined automatically based on the content
- px — pixels
- vh (viewport height) — the height is defined as a percentage of the browser viewport height. For example, "10vh" means 10% of the viewport height.
Width Select one of the following units of measurement: - auto — the width will be determined automatically based on the content
- px — pixels
- vw (viewport width) — the width is defined as a percentage of the browser viewport width. For example, "10vw" means 10% of the viewport width.
-
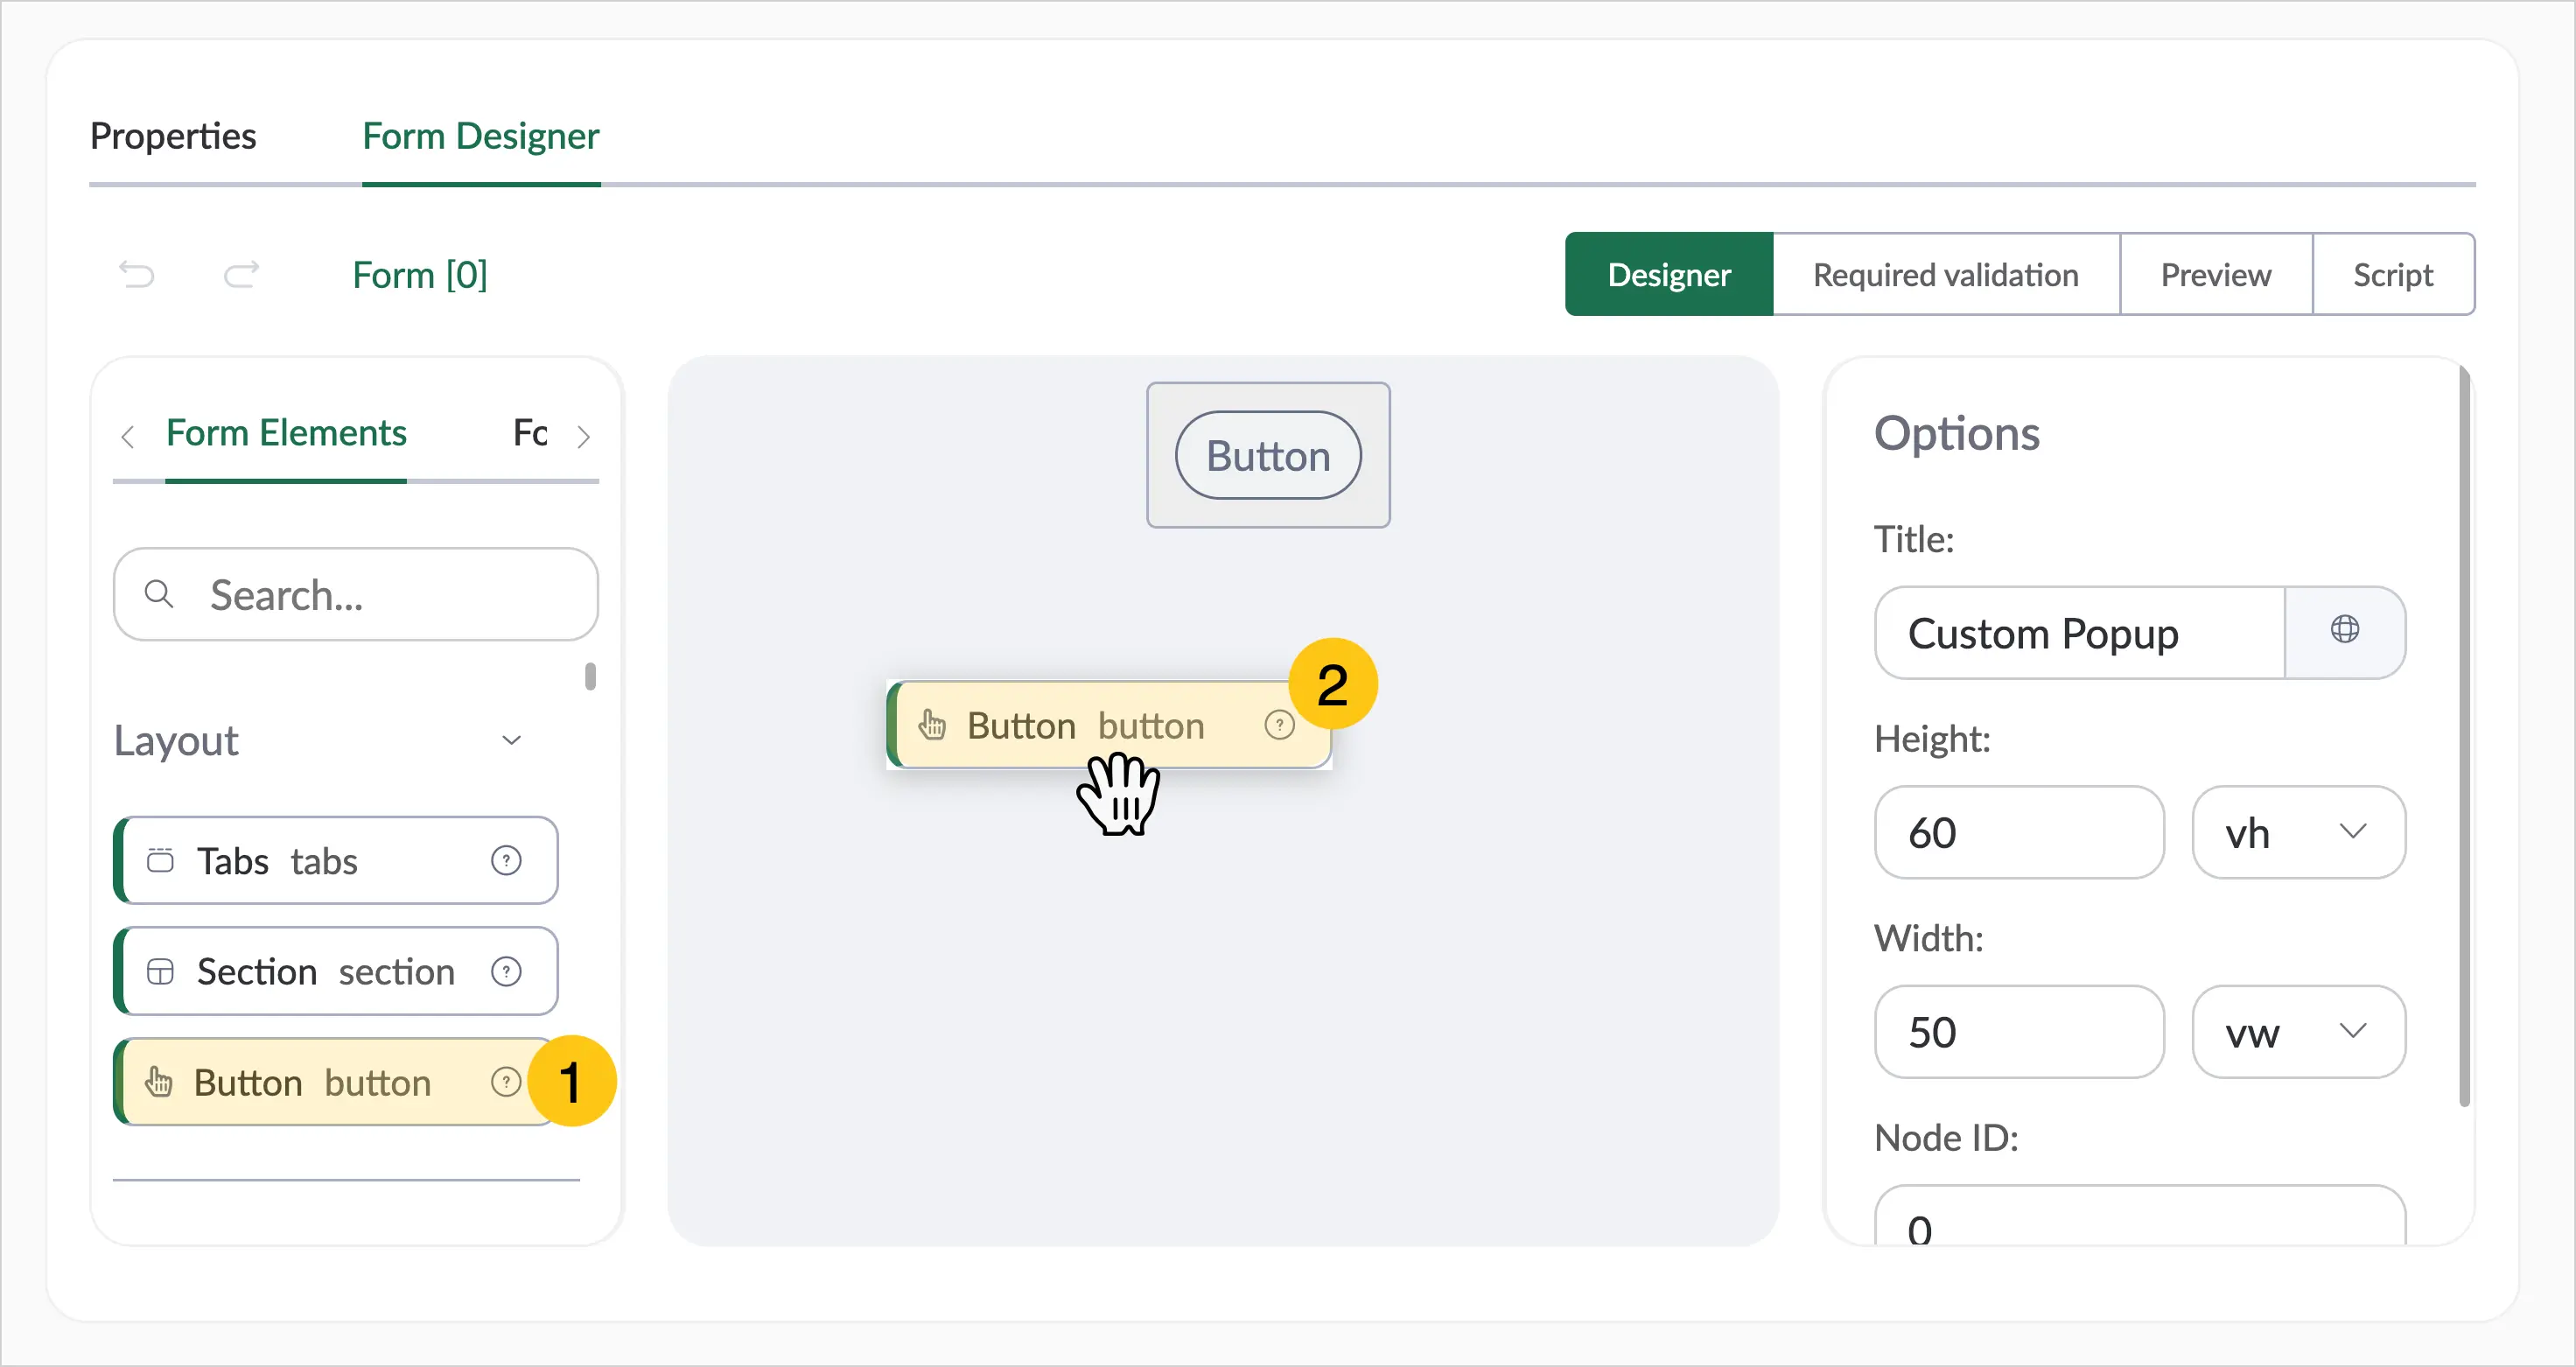
Drag the required attributes from the attribute panel 1 onto the form 2.
 Note:
Note:Only custom attributes of the following types can be used on the form: Date and/or Time, Text, Number, Hyperlink, Reference, Multiple Reference, Boolean.
-
Configure each attribute added to the form. To do this, select the attribute on the form, then in the Options menu, configure it using the hints for the relevant type: Date and/or Time, Text, Number, Hyperlink, Reference, Multiple Reference, Boolean.
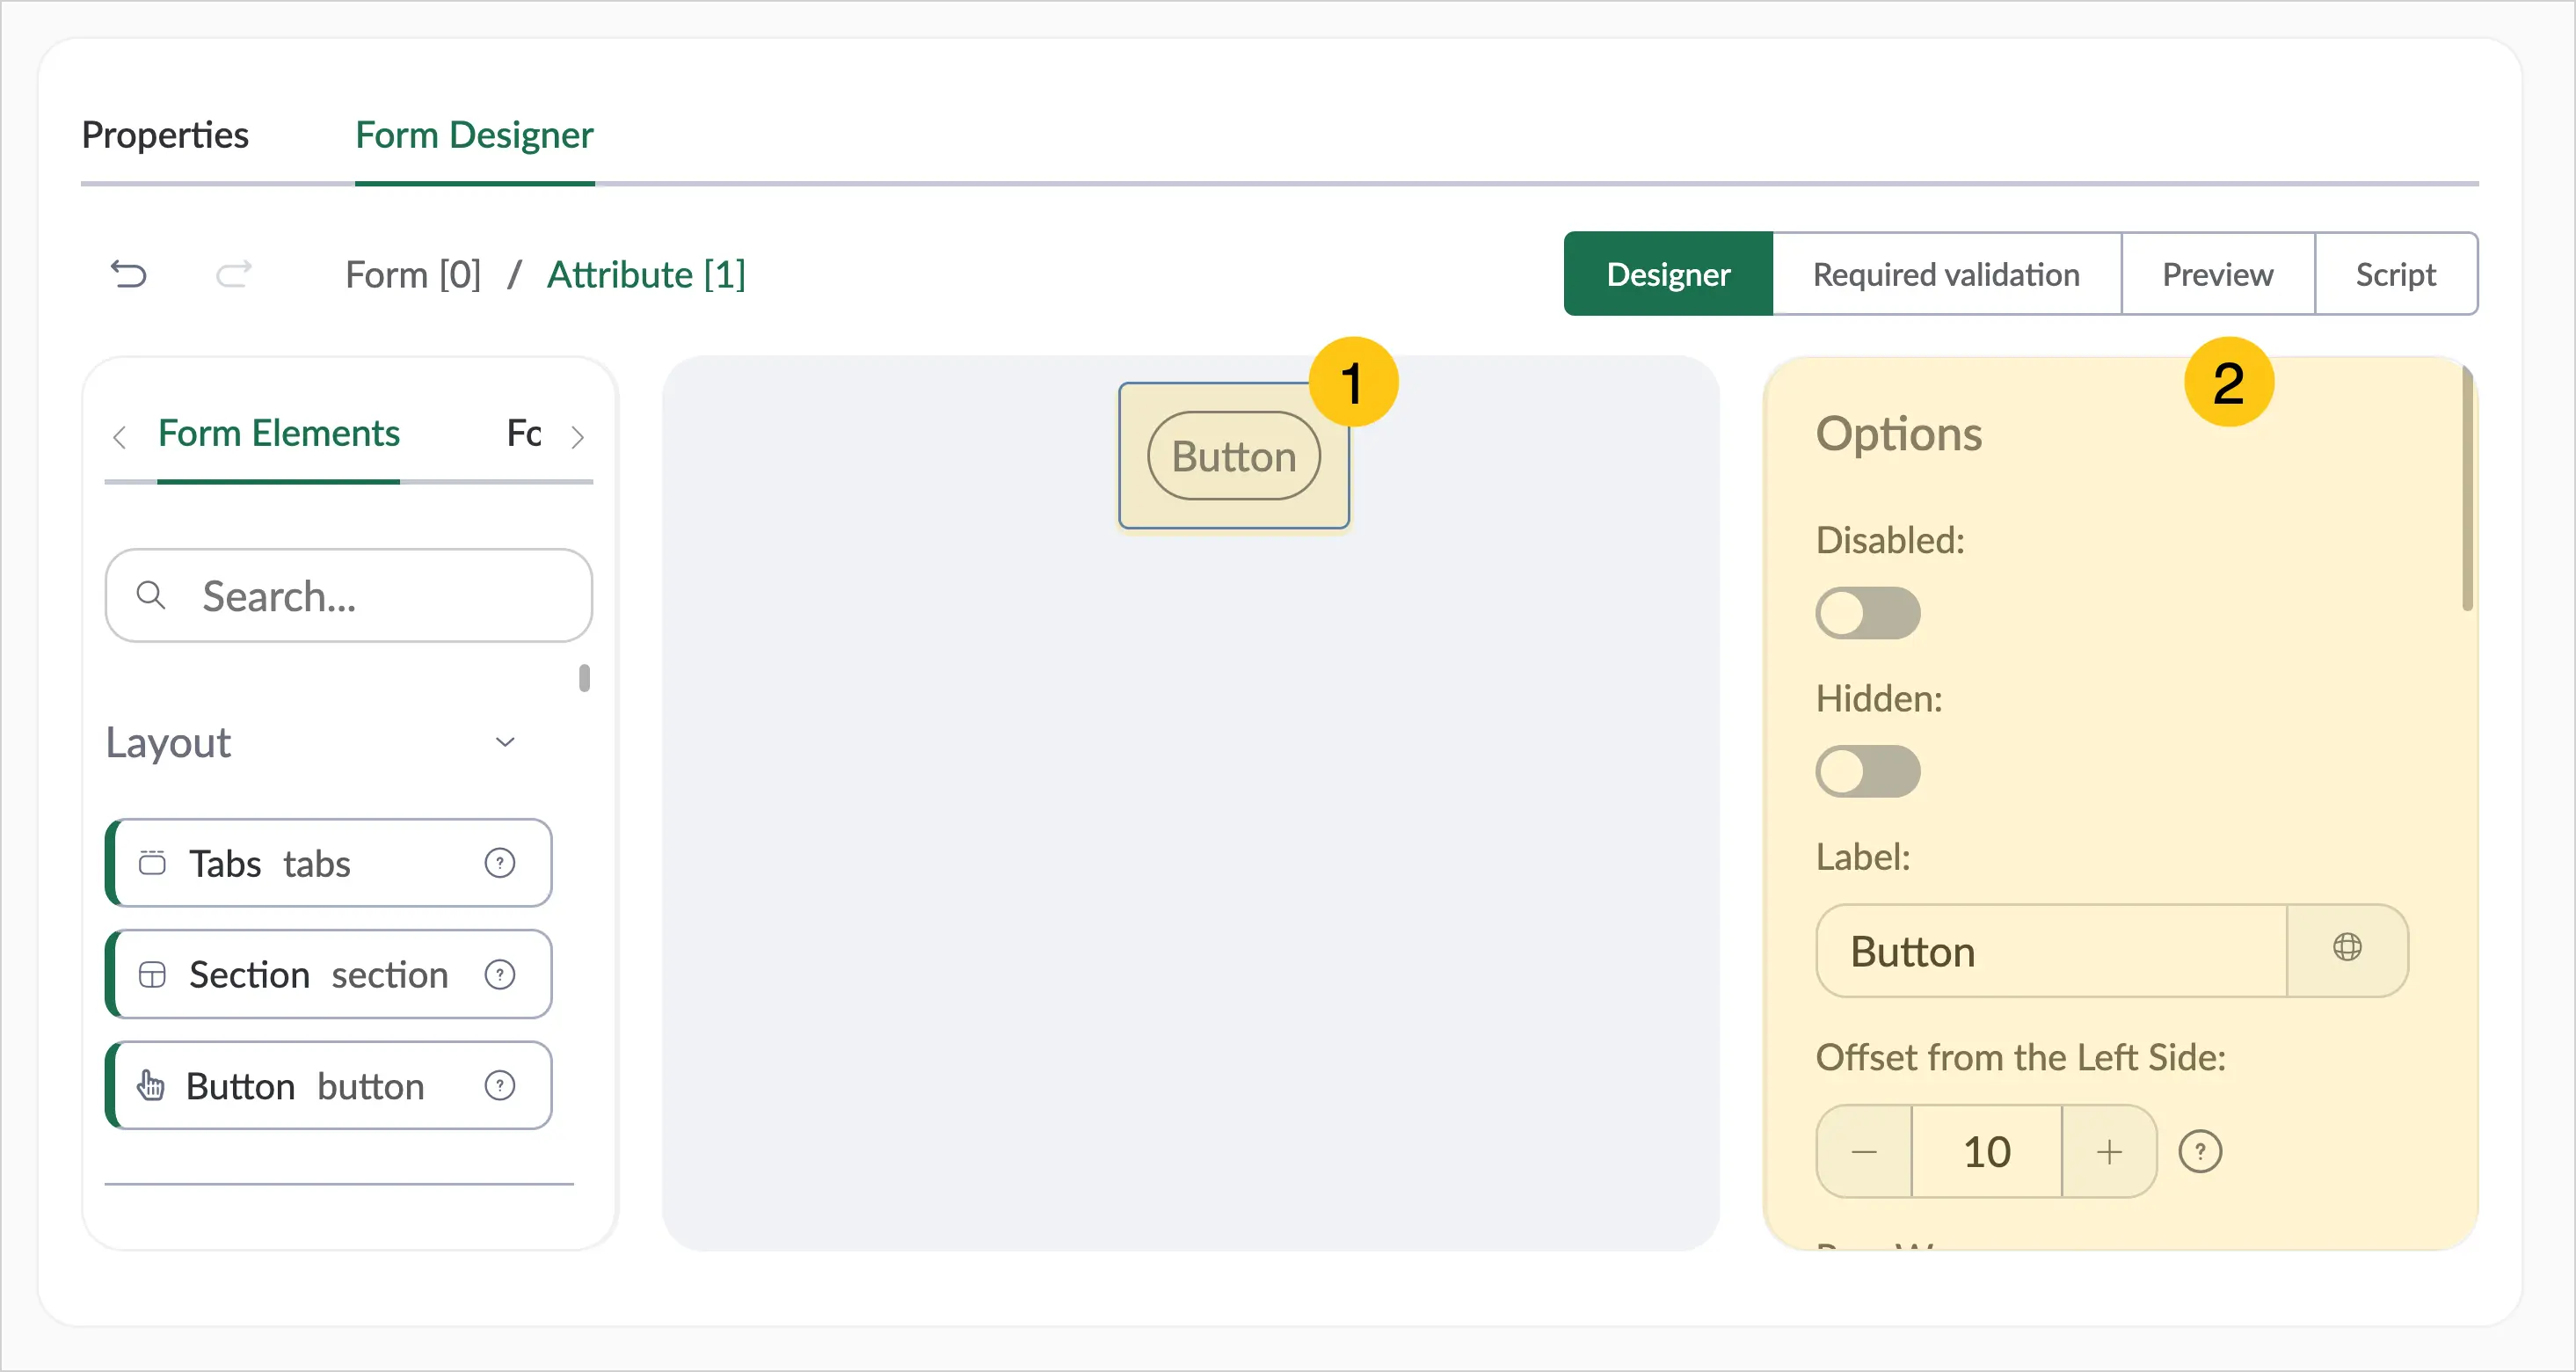
-
In the toolbar, select Save 1, then proceed to the Required Validation section 2.
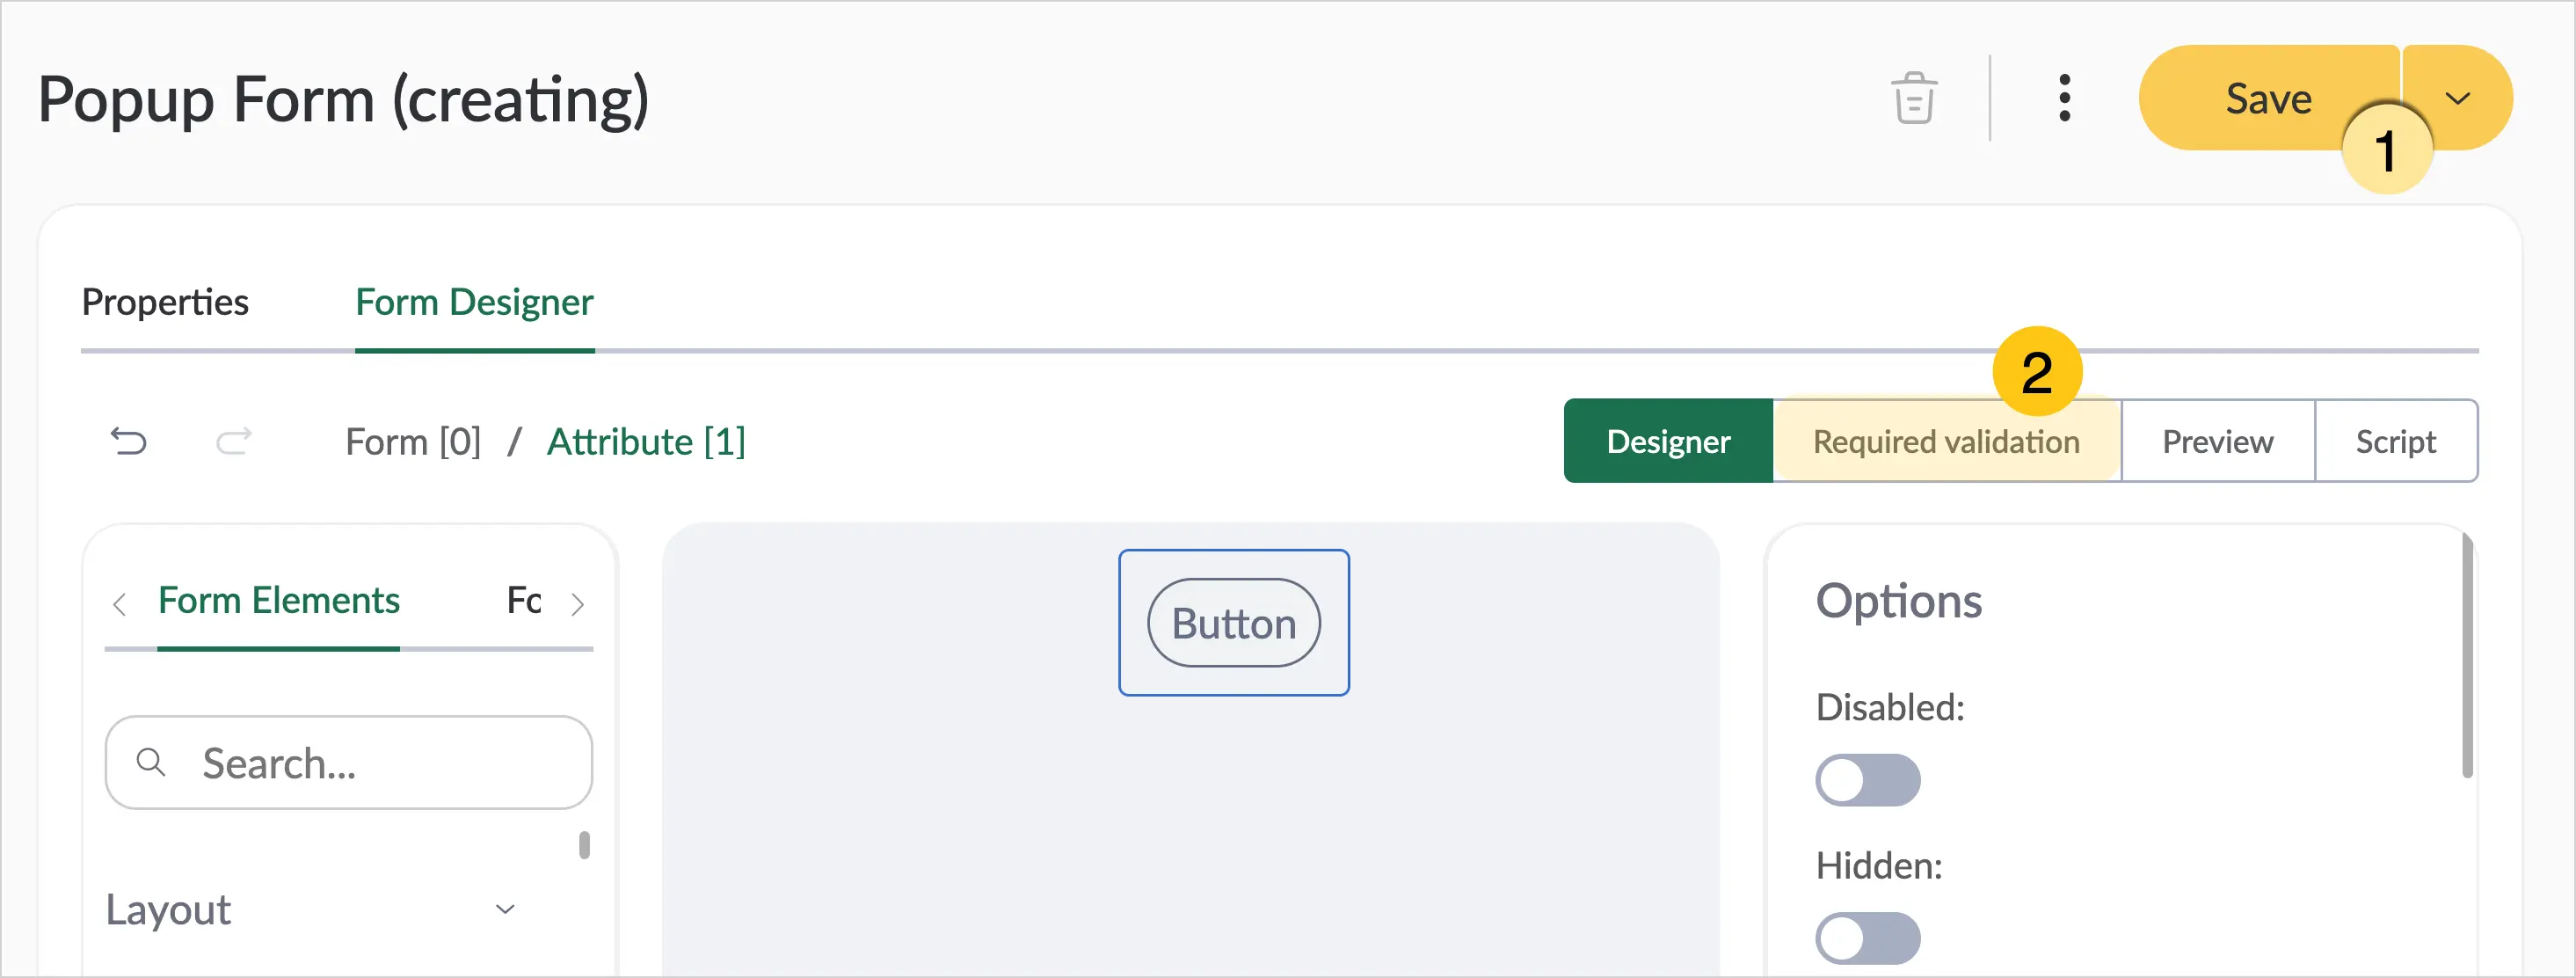
-
In the toolbar, select Save 1, then, if needed, go to the Script section 2 to configure additional functions for the form. The following events are available for popup forms:
event.formData.getAttribute()— get an attribute valueevent.formData.setAttribute()— set an attribute valueformData_attributeChanged_хх(event) { }— react to an attribute value changeformData_validateAttribute_ххх(event) { }— validate an attribute value
See more in the Via the Script Module section.
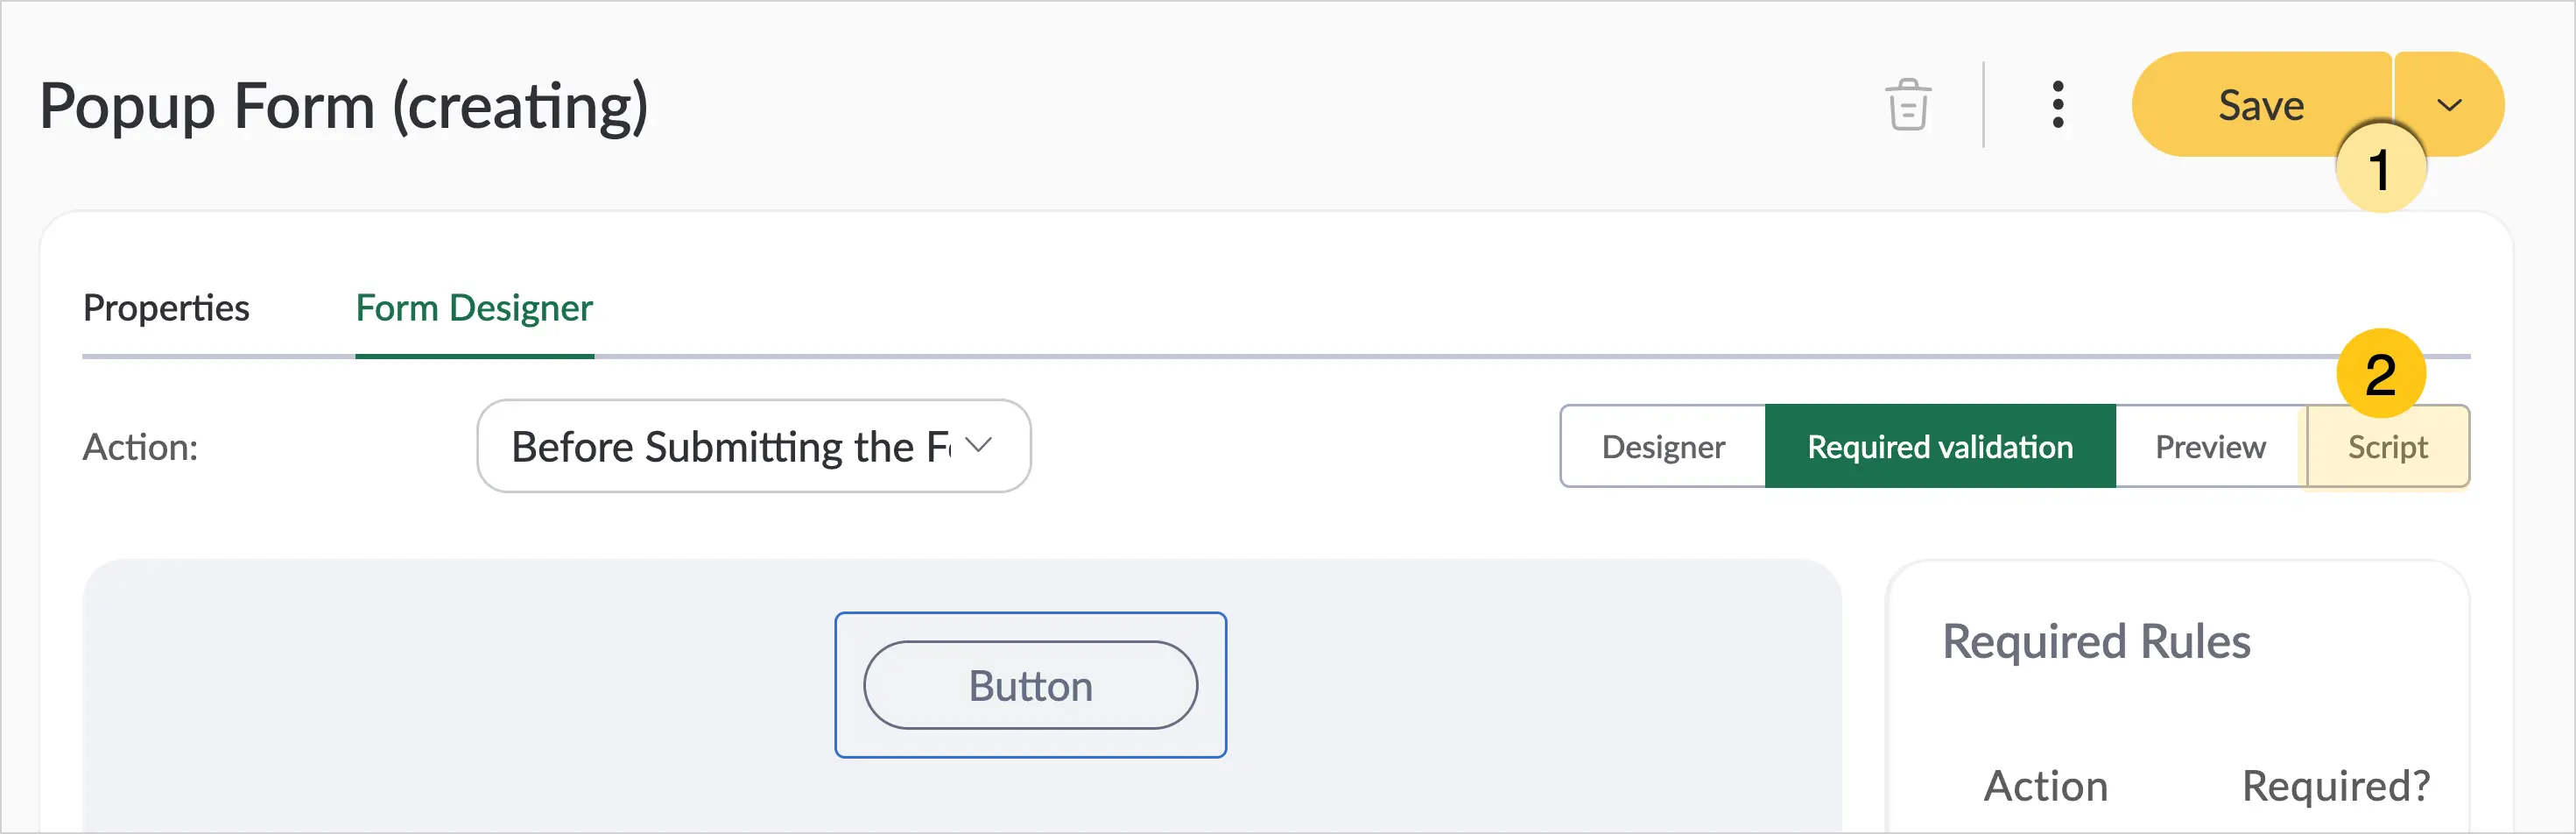
After completing the configuration, you can go to the Preview section to check how the form will be displayed.
2.7.1.2. Apply a Pop-up Form
After creating a pop-up form, you need to configure the mapping between the pop-up form attributes and the attributes of the document, task, or user dictionary. Mapping is performed by attribute type — for example, Text type attributes can only be mapped to other Text type attributes.
To map attributes, choose one of the following methods:
- Via the Button attribute on the form — used for a document type form, task form, or user dictionary form that contains the Button layout attribute.
- By adding an action to a document type.
- By adding an action to a task form.
- Via the script module.
2.7.1.2.1. Via the "Button" Attribute on the Form
-
Navigate to the required document type, task form, or user dictionary form.
1.1. To add this attribute to a document type:
-
In the navigation panel, select the Studio 1 desktop.
-
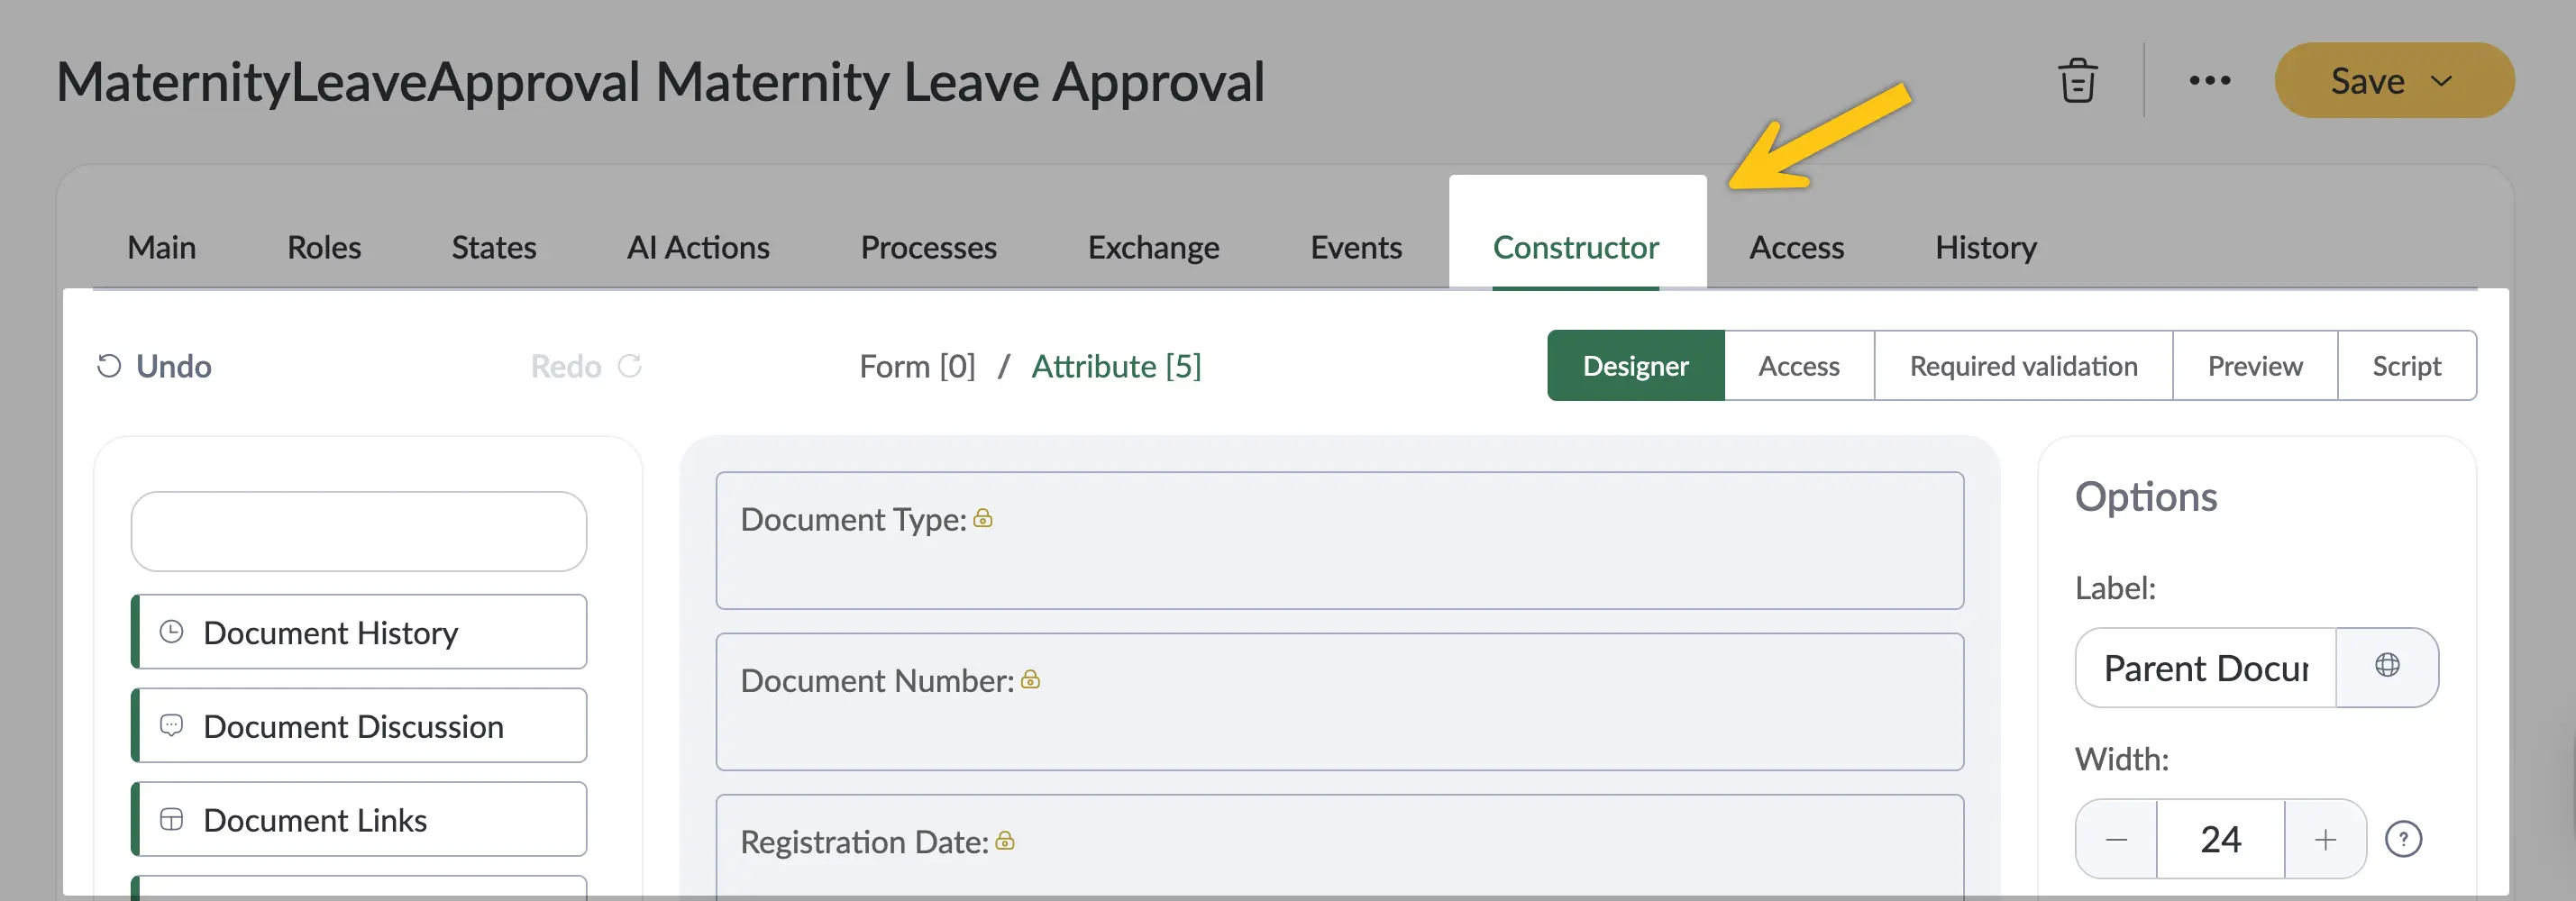
Go to the Document Types 2 shortcut > the required document type 3.
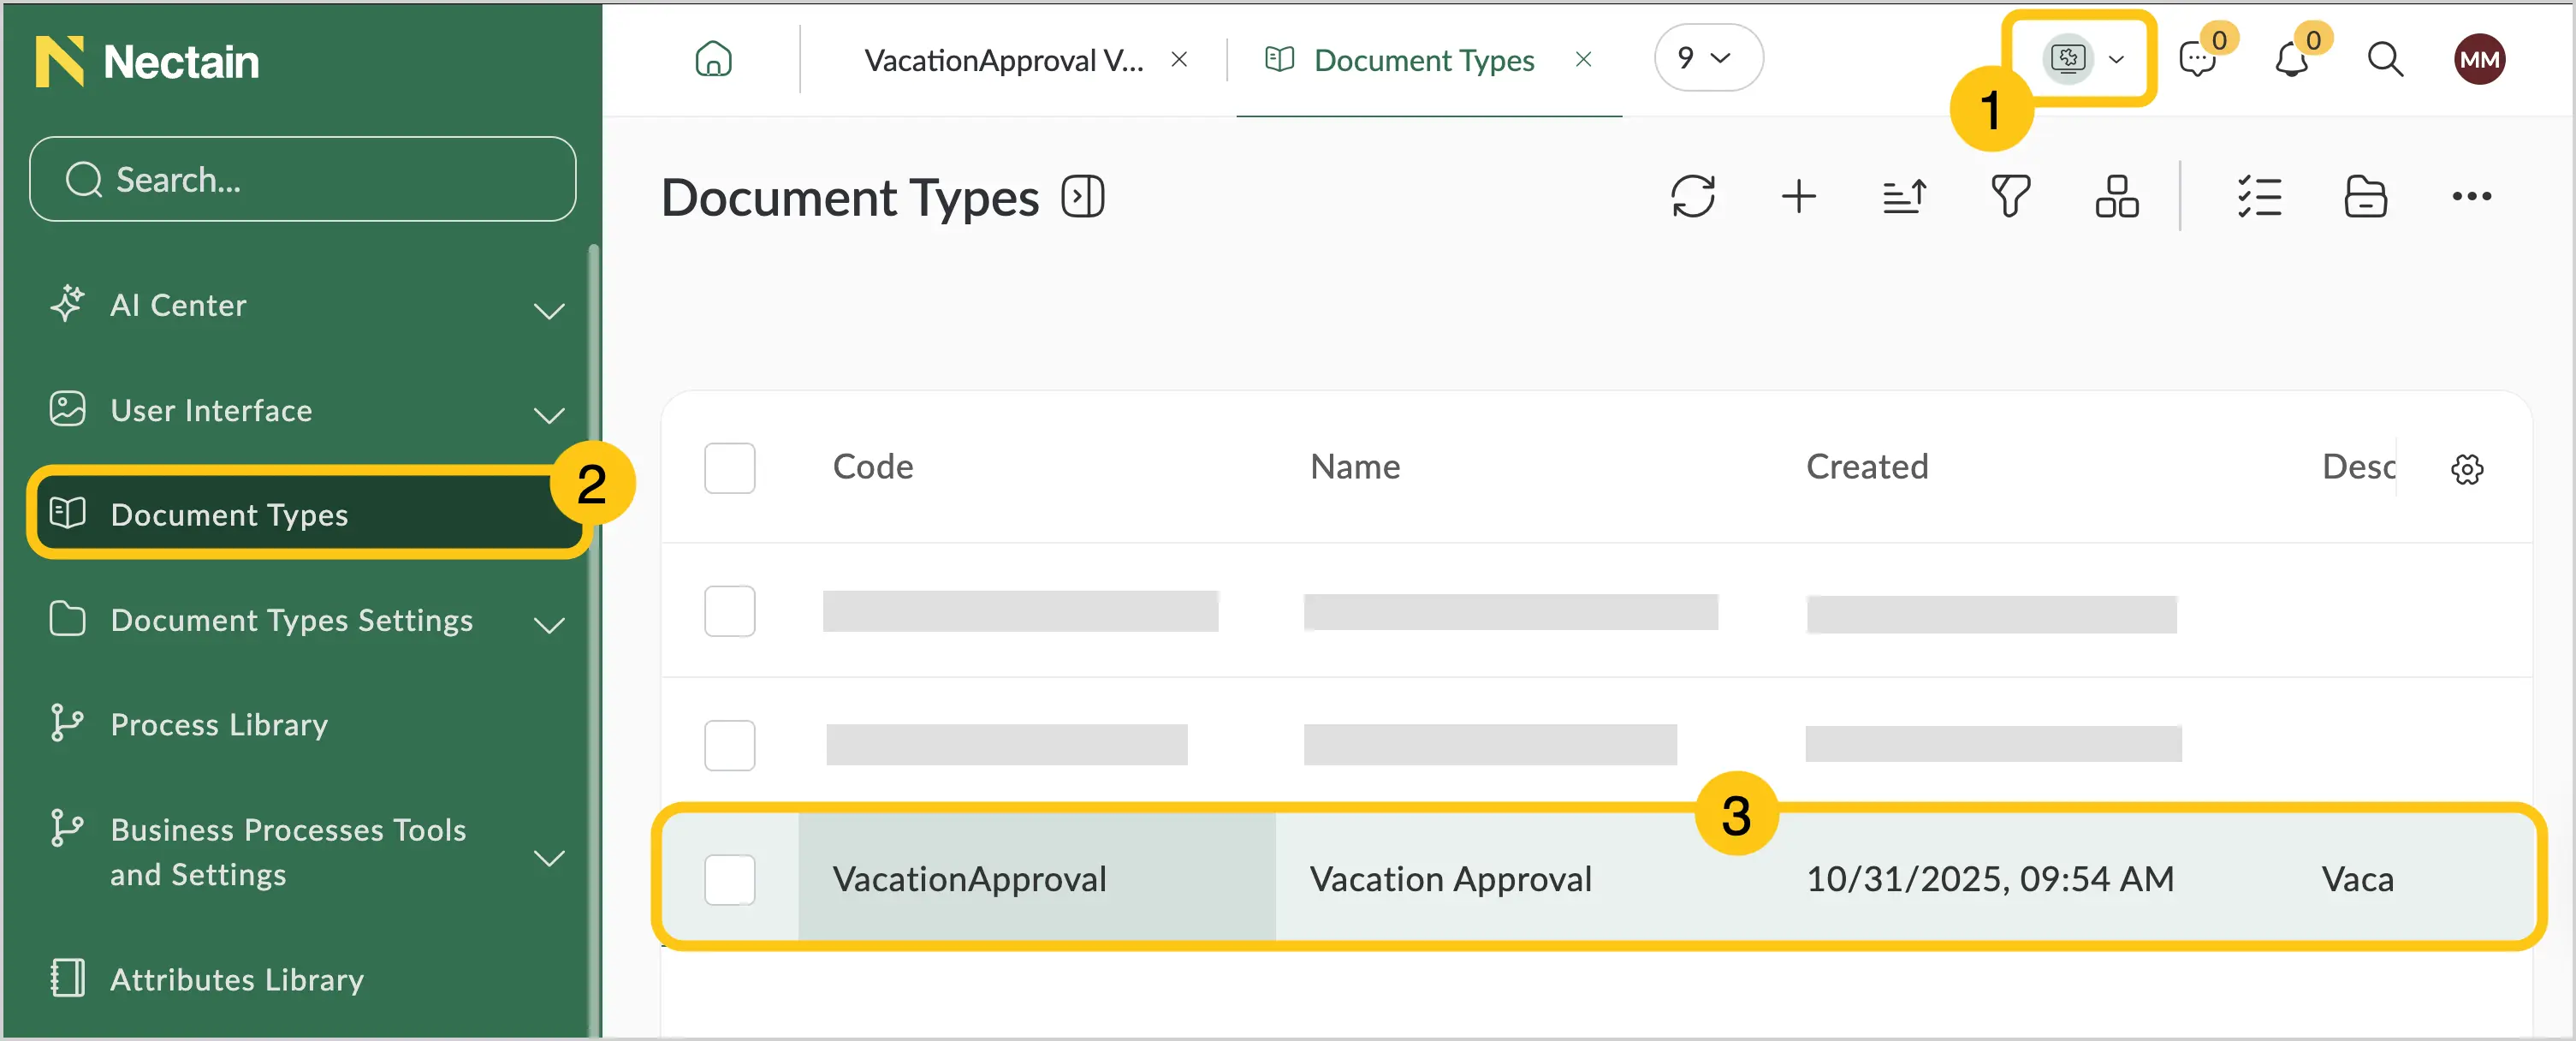
-
Go to the Constructor tab.
Or
1.2. To add the attribute to a task form:
-
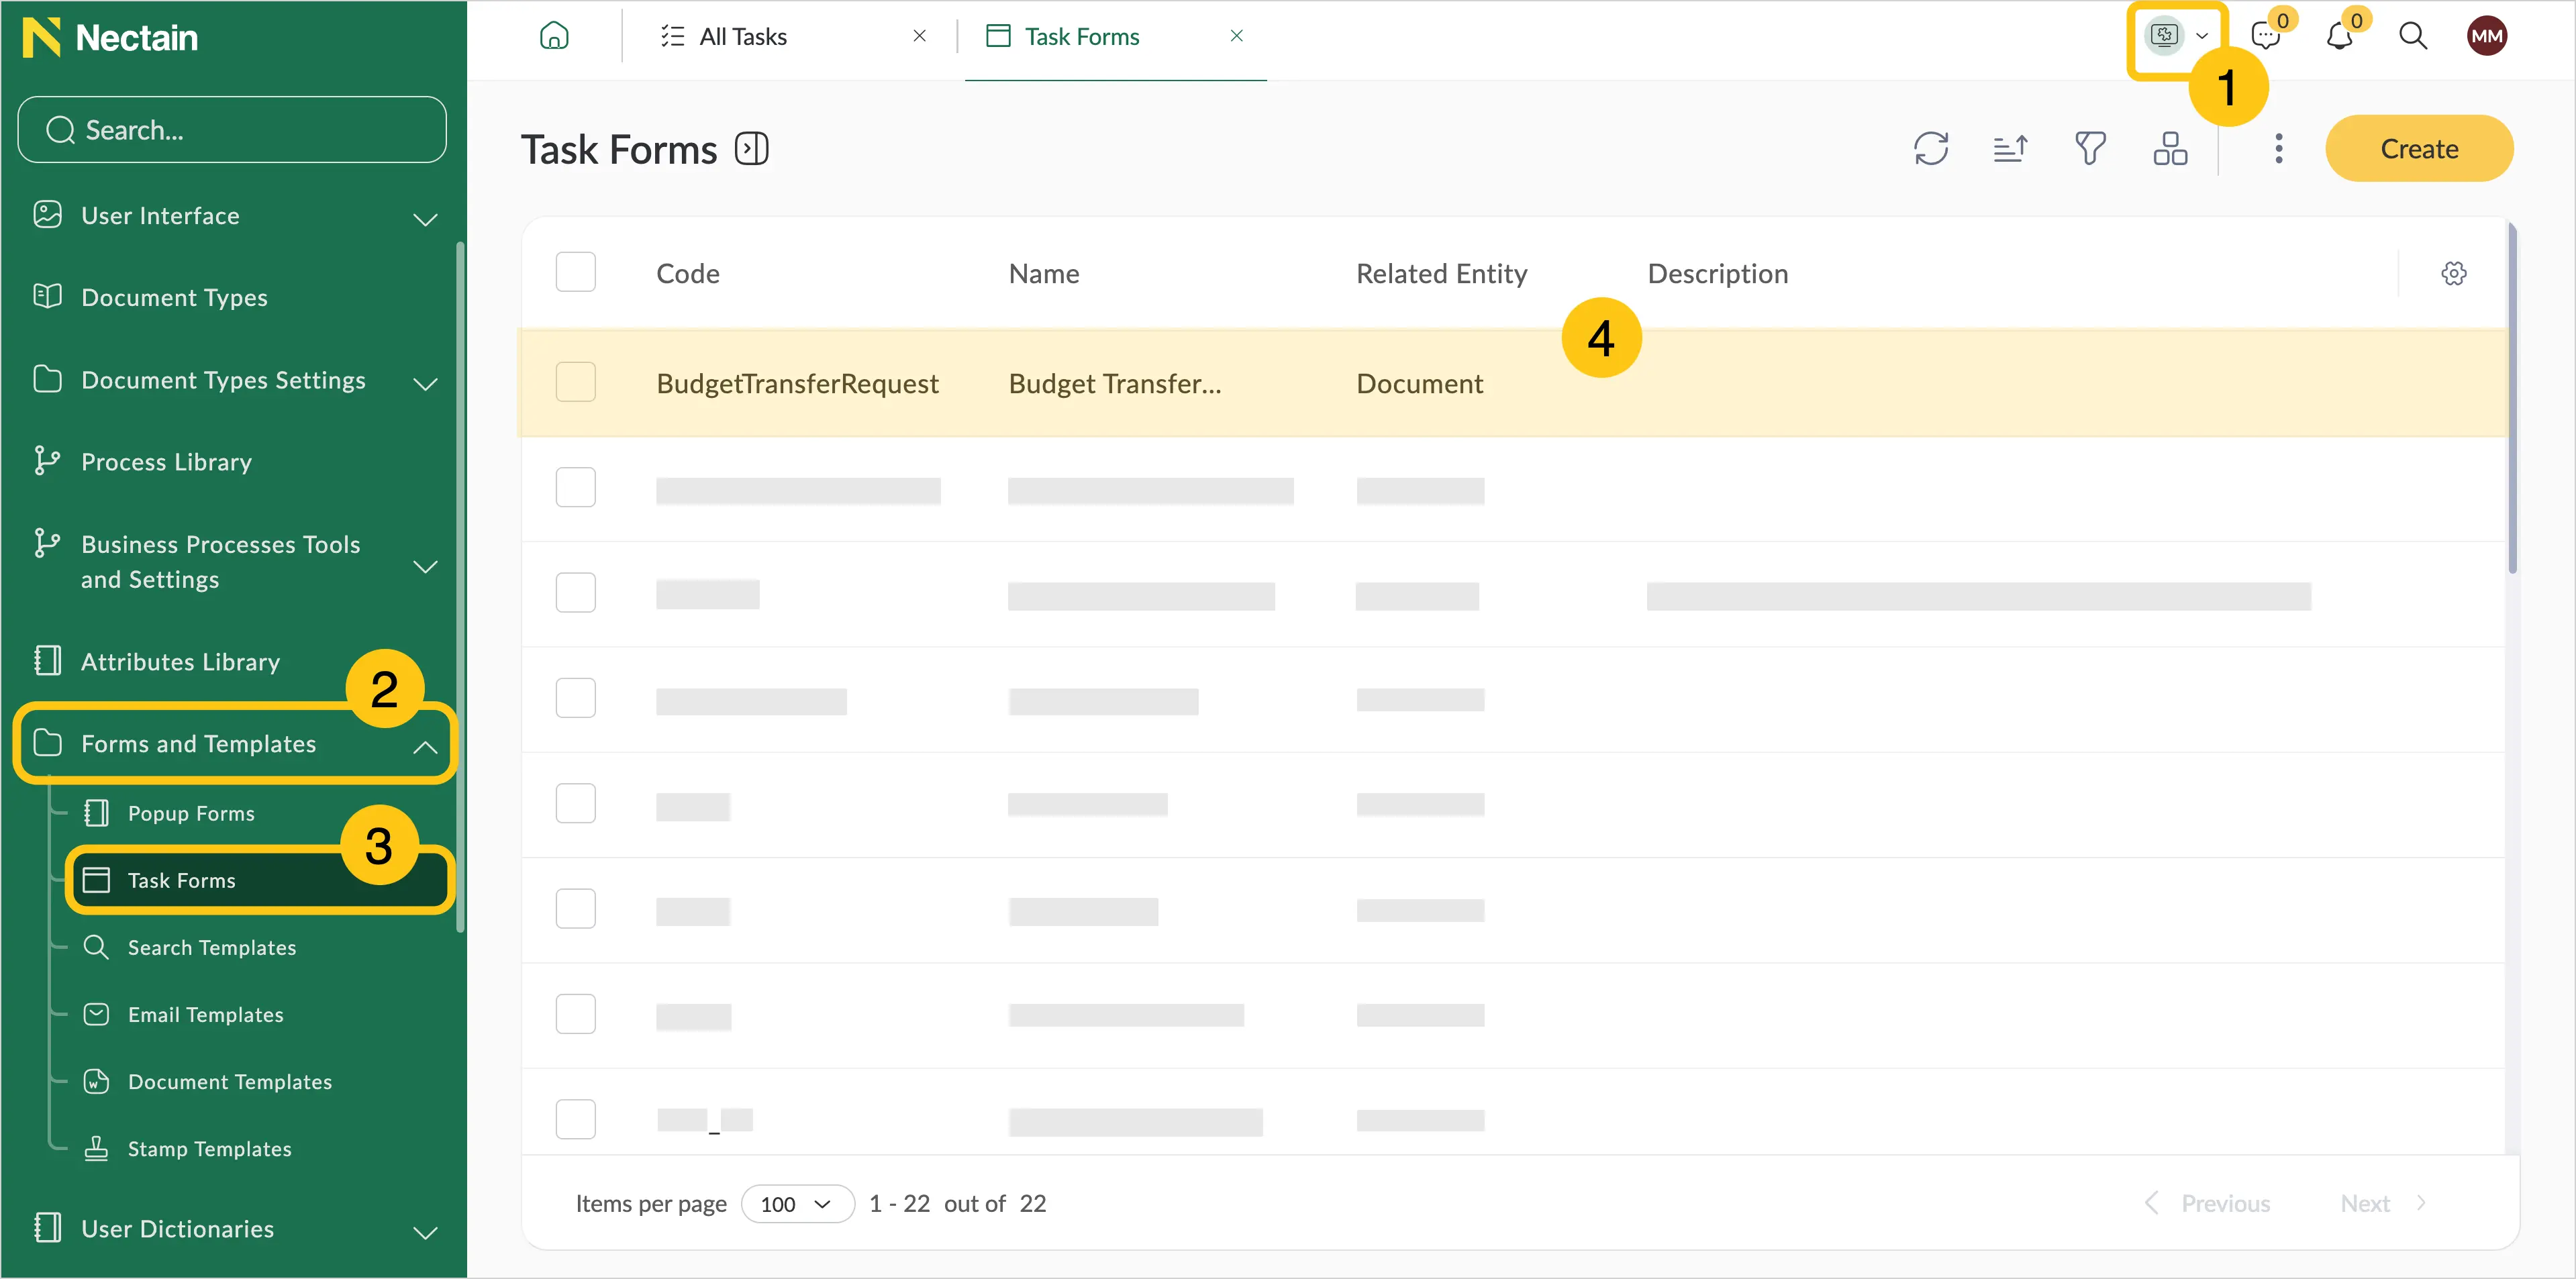
In the navigation panel, select the Studio 1 desktop.
-
Go to the Forms and Templates 2 shortcut group > Task Forms 3 shortcut.
-
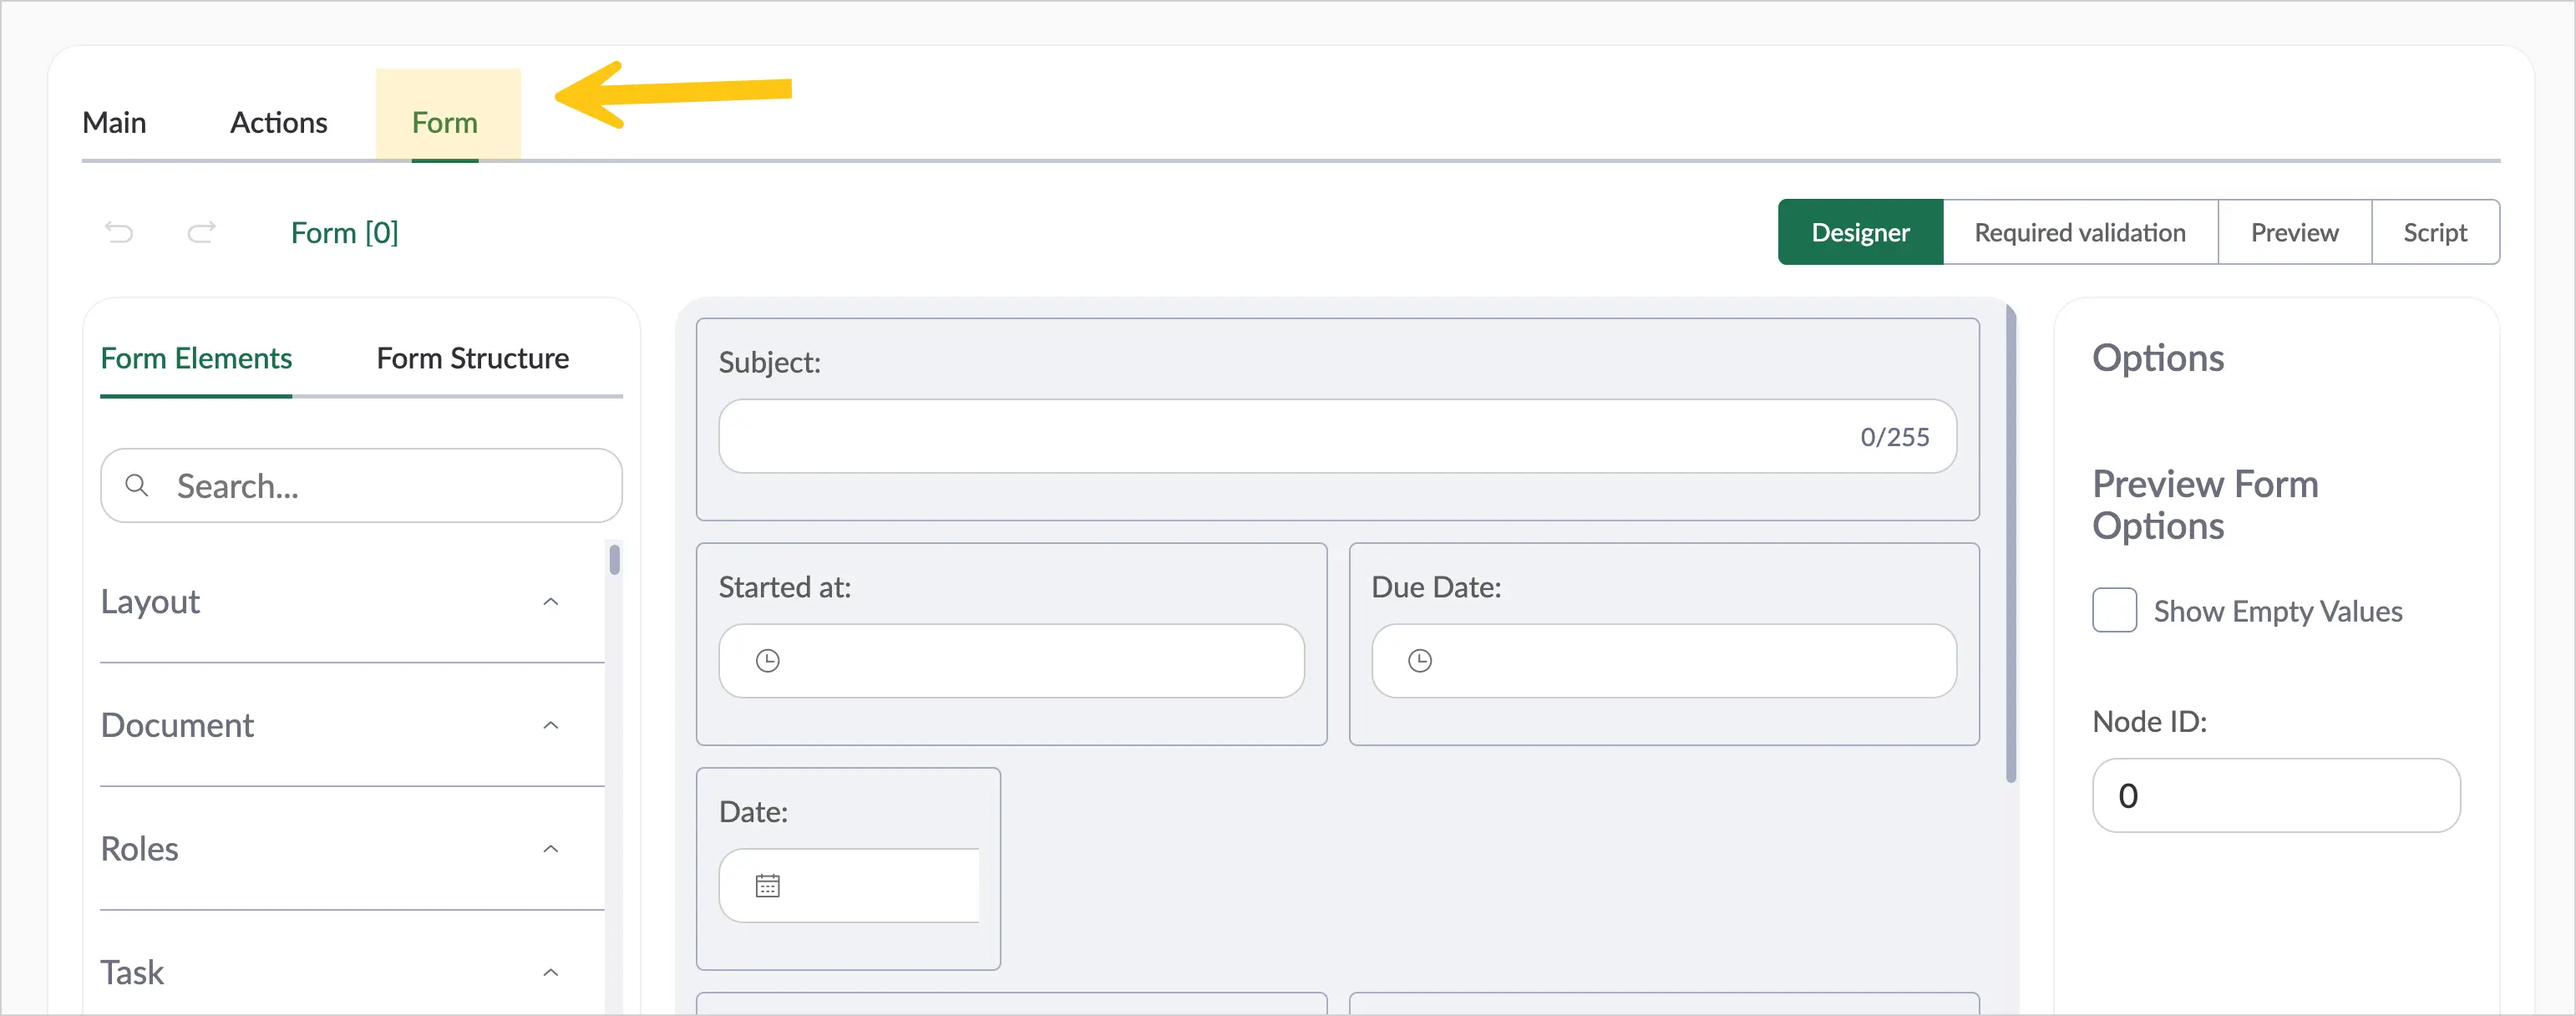
Go to the Form tab.
Or
1.3. To add the attribute to a user dictionary form:
-
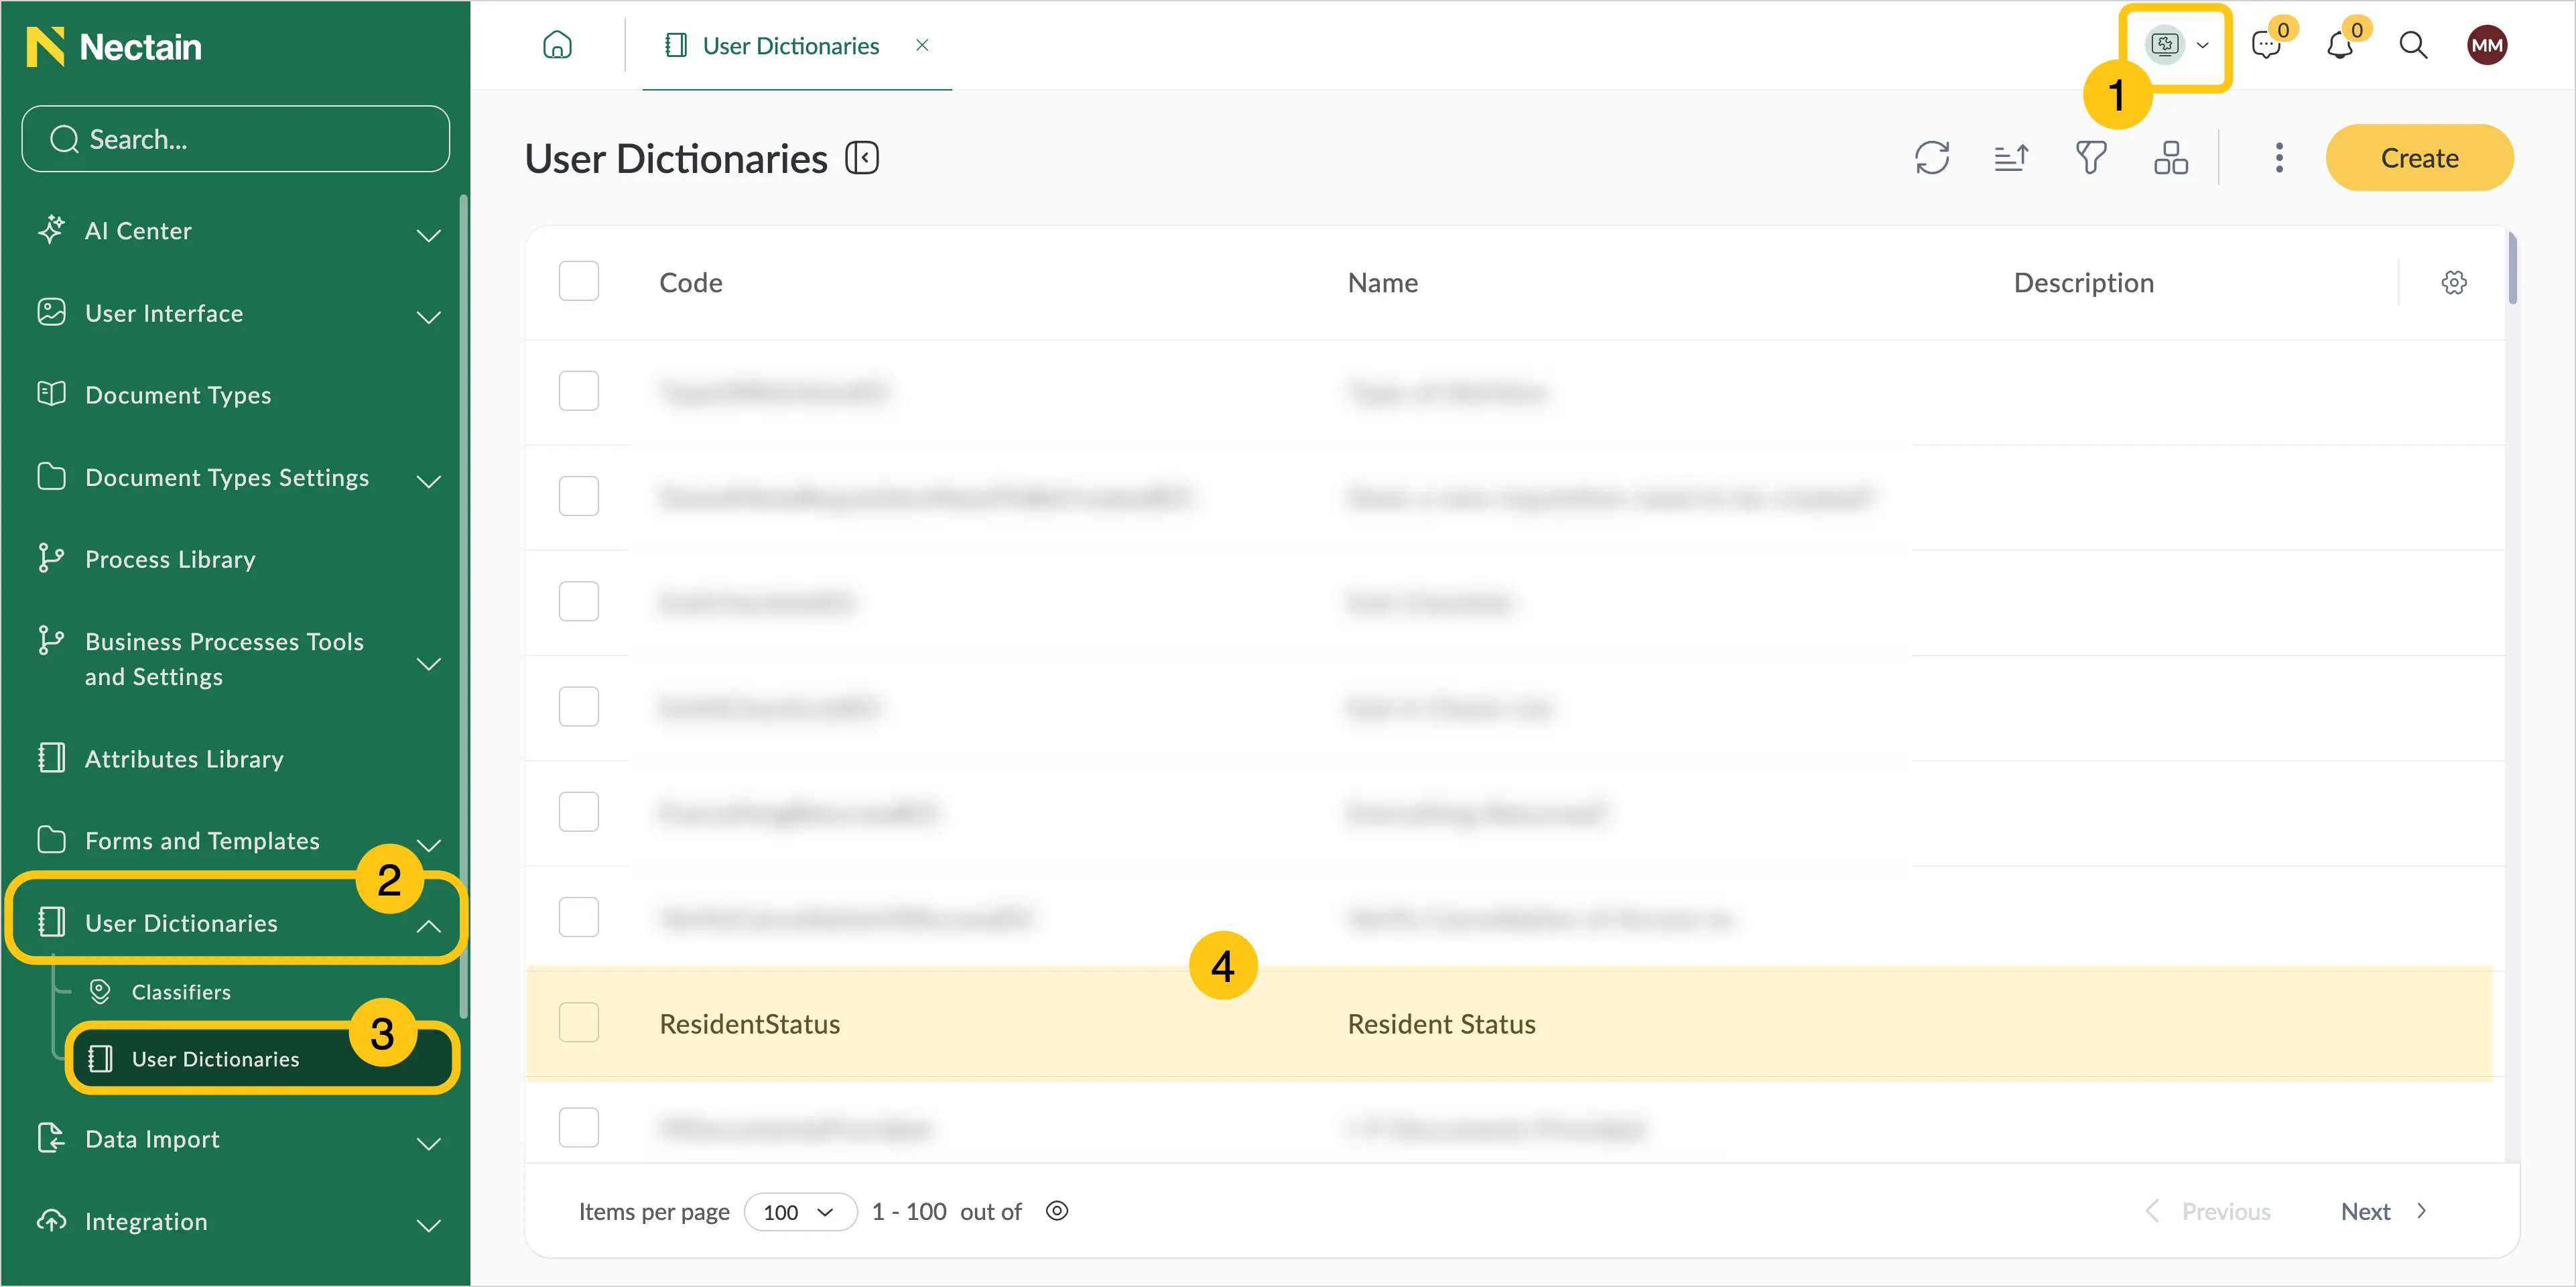
In the navigation panel, select the Studio 1 desktop.
-
Go to the User Dictionaries 2 shortcut group > User Dictionaries 3 shortcut, then select the required user dictionary 4.
-
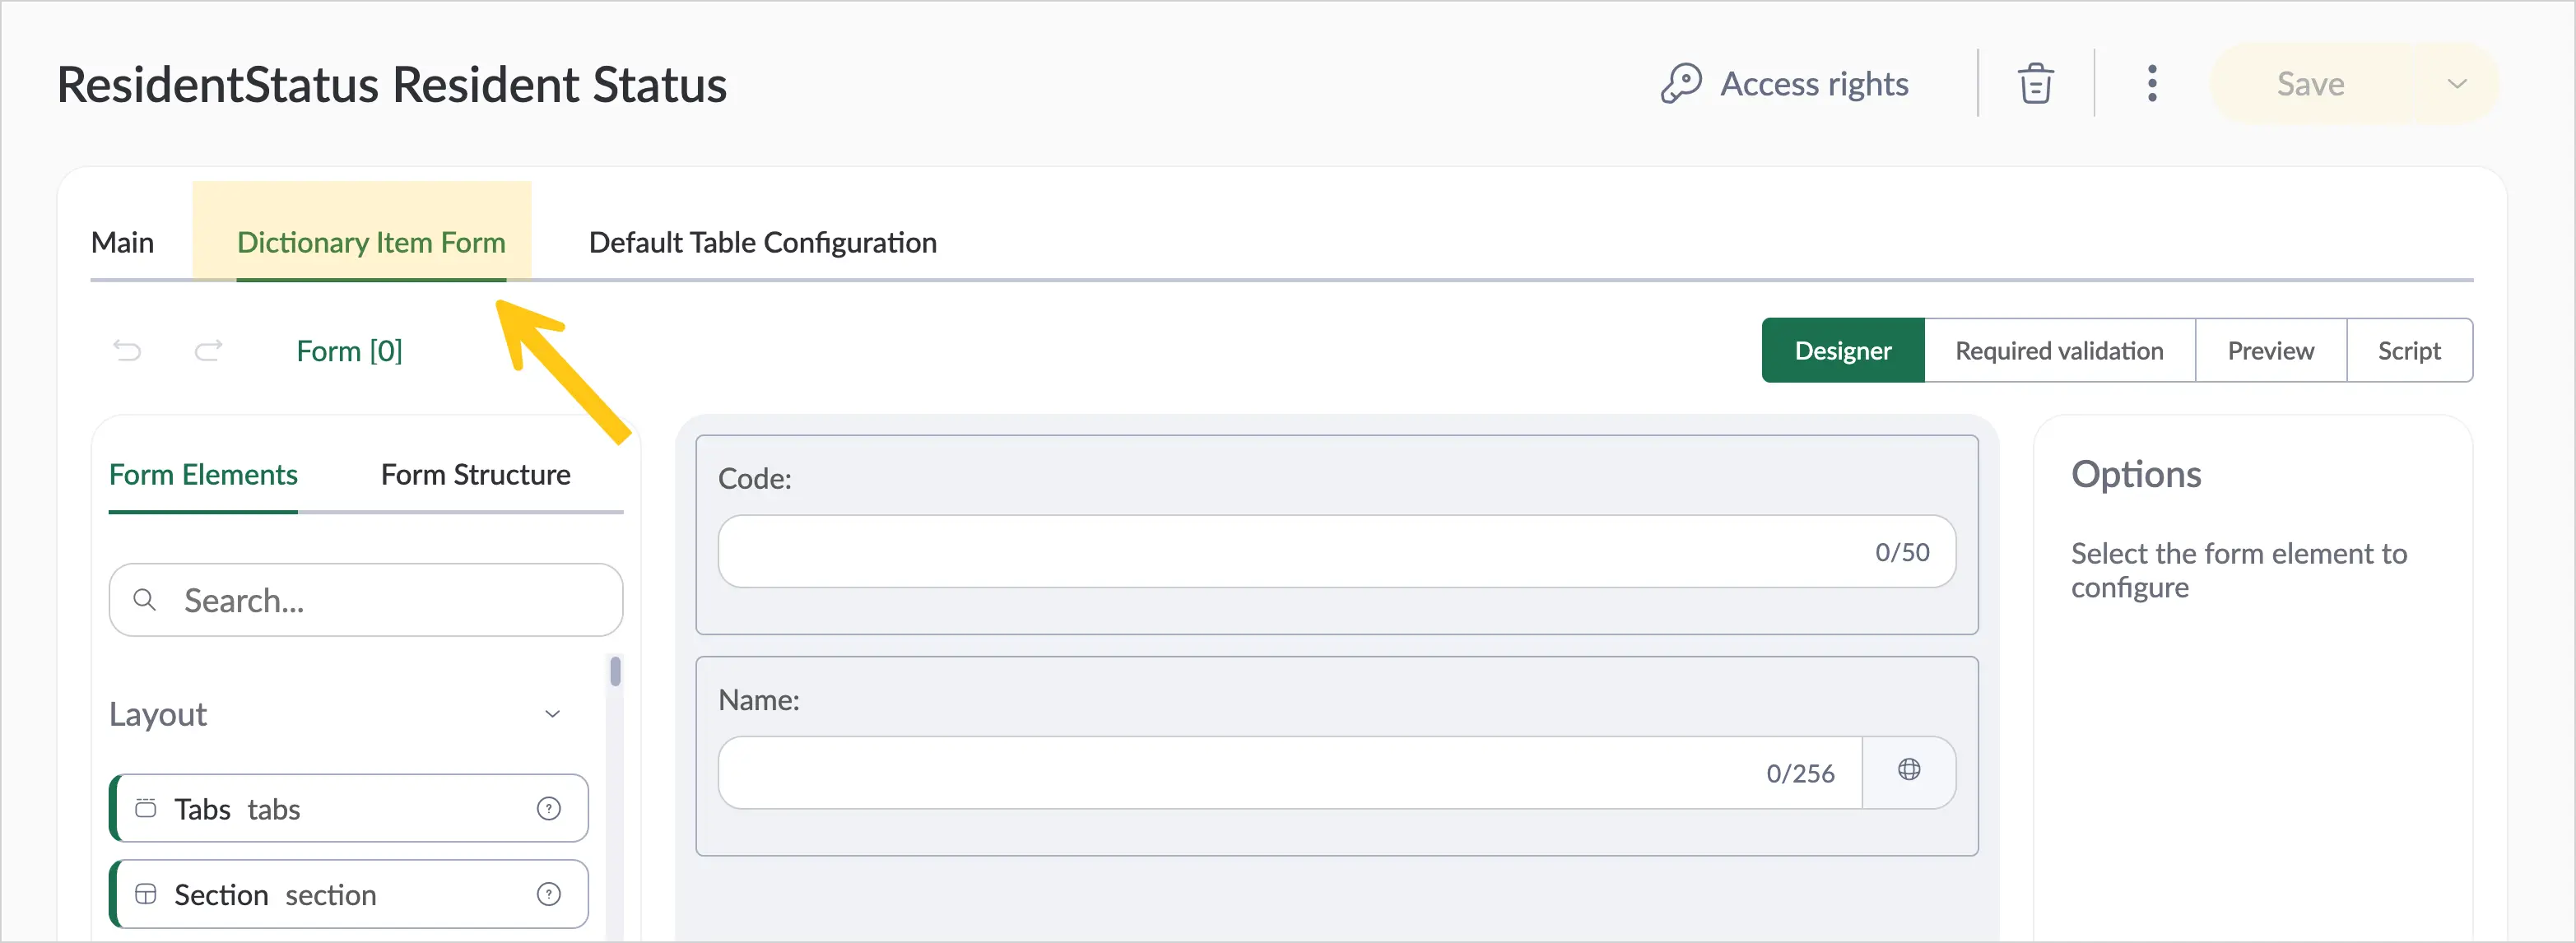
Go to the Dictionary Item Form tab.
-
-
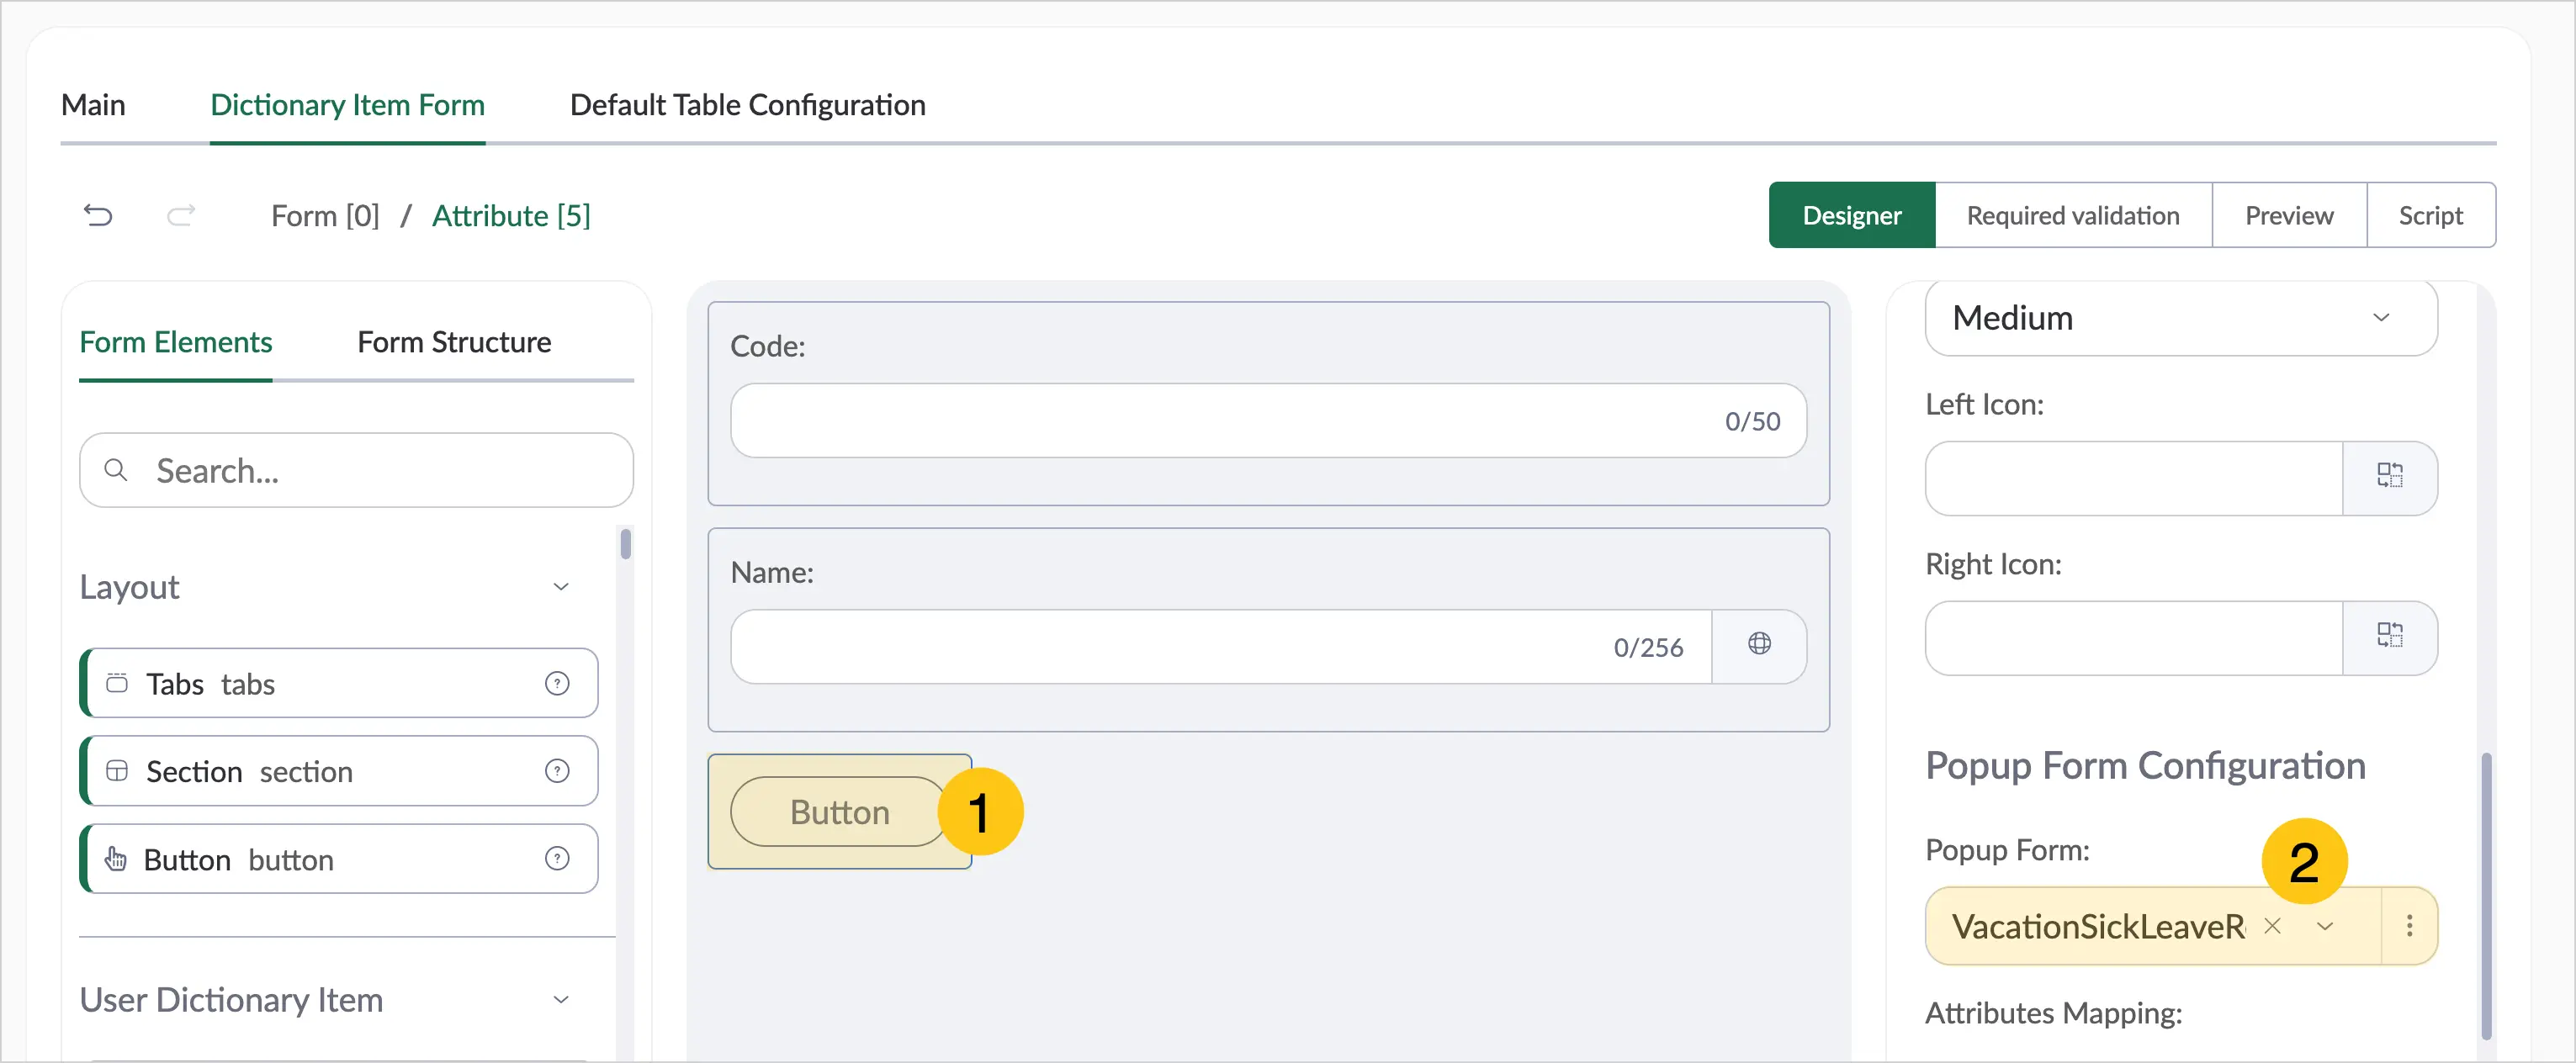
Find the Button attribute on the form, then select it 1.
-
In the Options menu, scroll down to the Popup Form Configuration section, then in the Popup form 2 field, select the pop-up form you want to display on the document, task, or user dictionary.
-
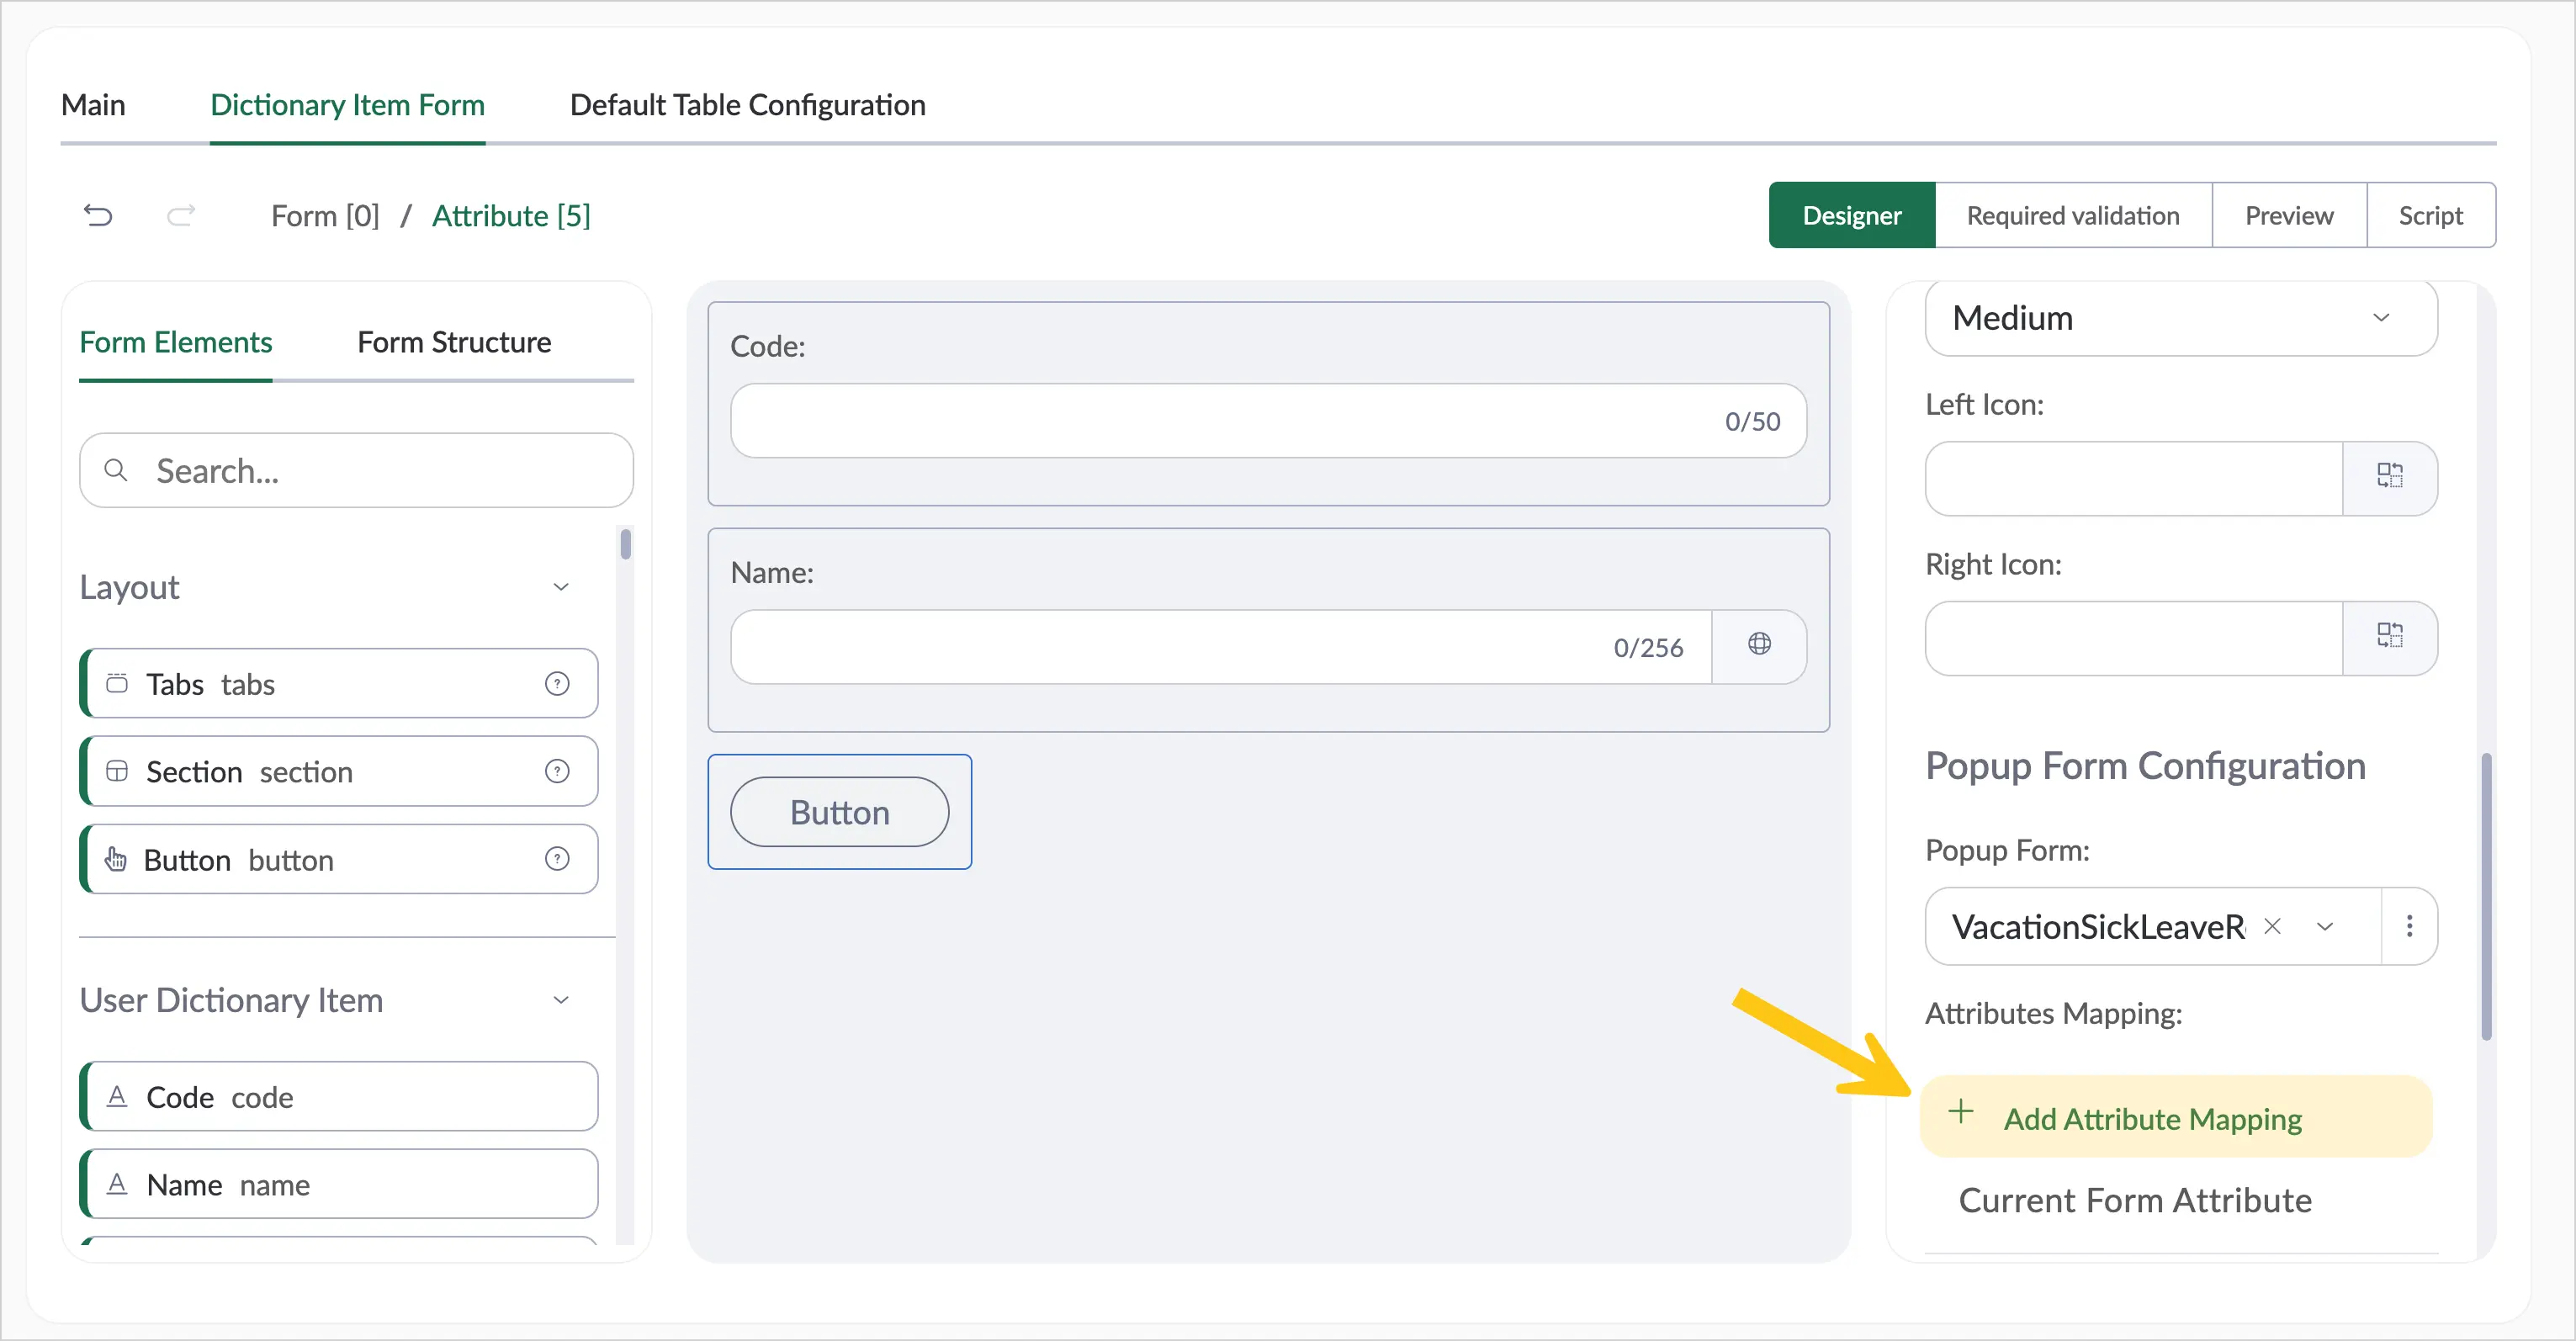
Select the Add Attribute Mapping button.
-
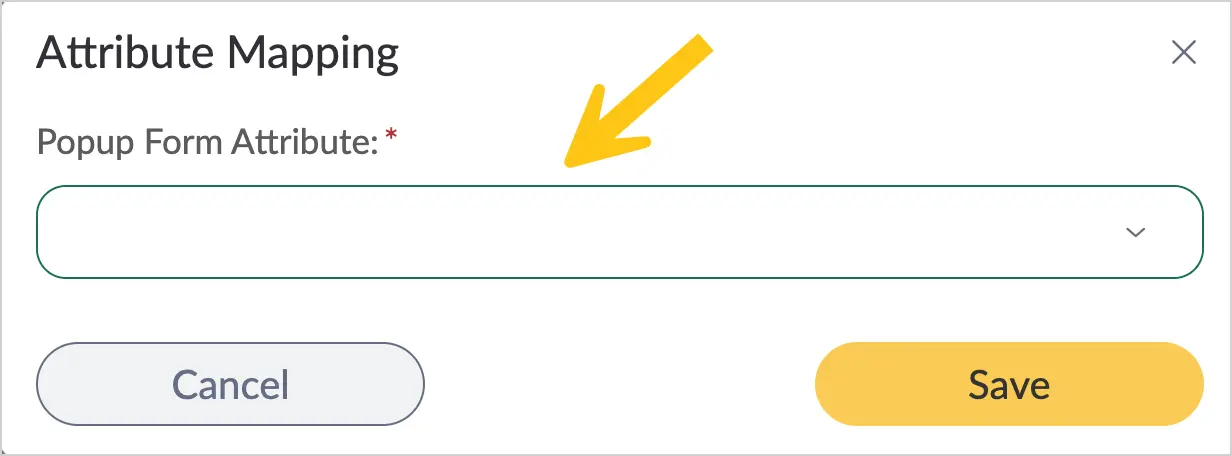
In the Attribute mapping window, in the Popup form attribute field, select the required attribute from the dropdown list.
-
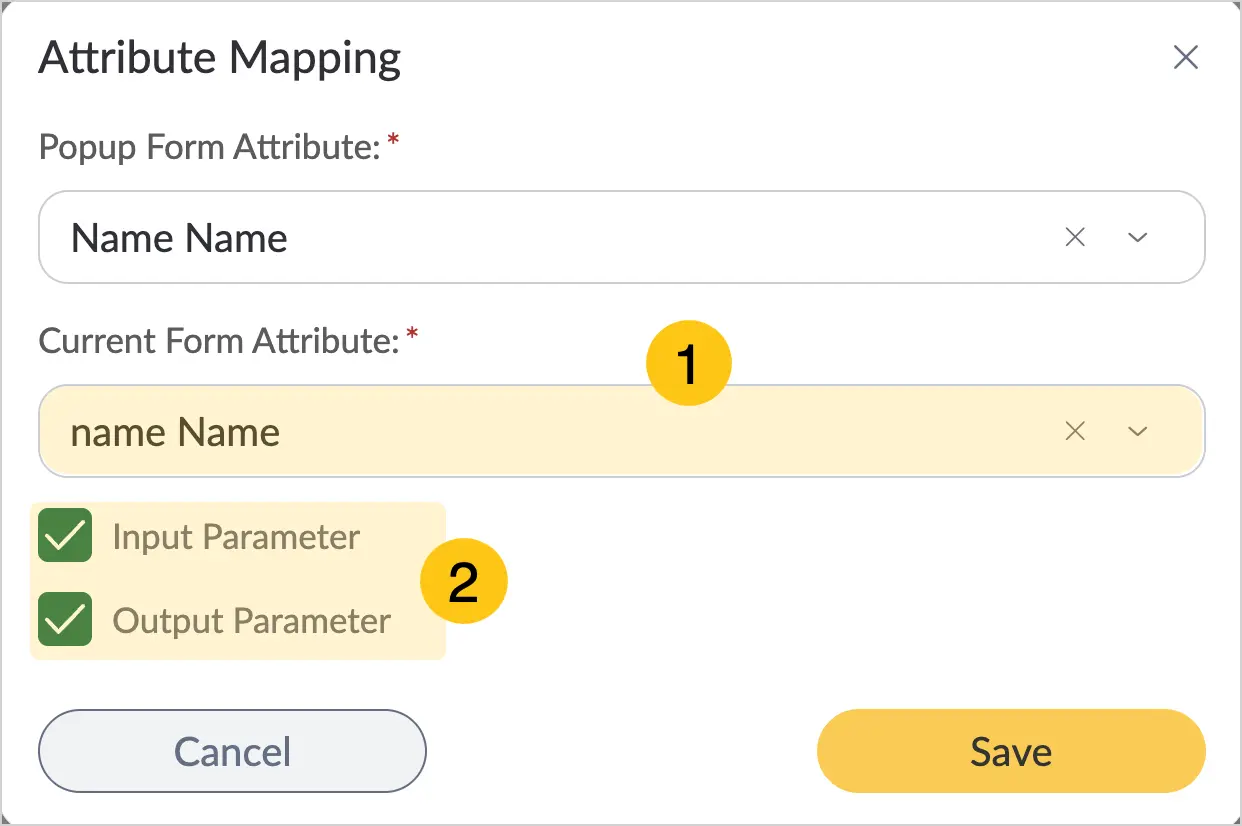
In the Current form attribute 1 field, select the attribute from the current document type, task, or user dictionary form to map to the pop-up form attribute.
-
Using the checkboxes 2, configure the mapping direction:
- Input Parameter — attributes from the document, task, or user dictionary are passed to the pop-up form.
- Output Parameter — attributes from the pop-up form are passed to the document, task, or user dictionary.
- Input + Output — attributes are passed in both directions.
-
Select the Save button.
2.7.1.2.2. By Adding an Action to a Document Type
-
In the navigation panel, select the Studio 1 desktop.
-
Go to the Document Types 2 shortcut > the required document type 3.
-
Go to the States tab.
-
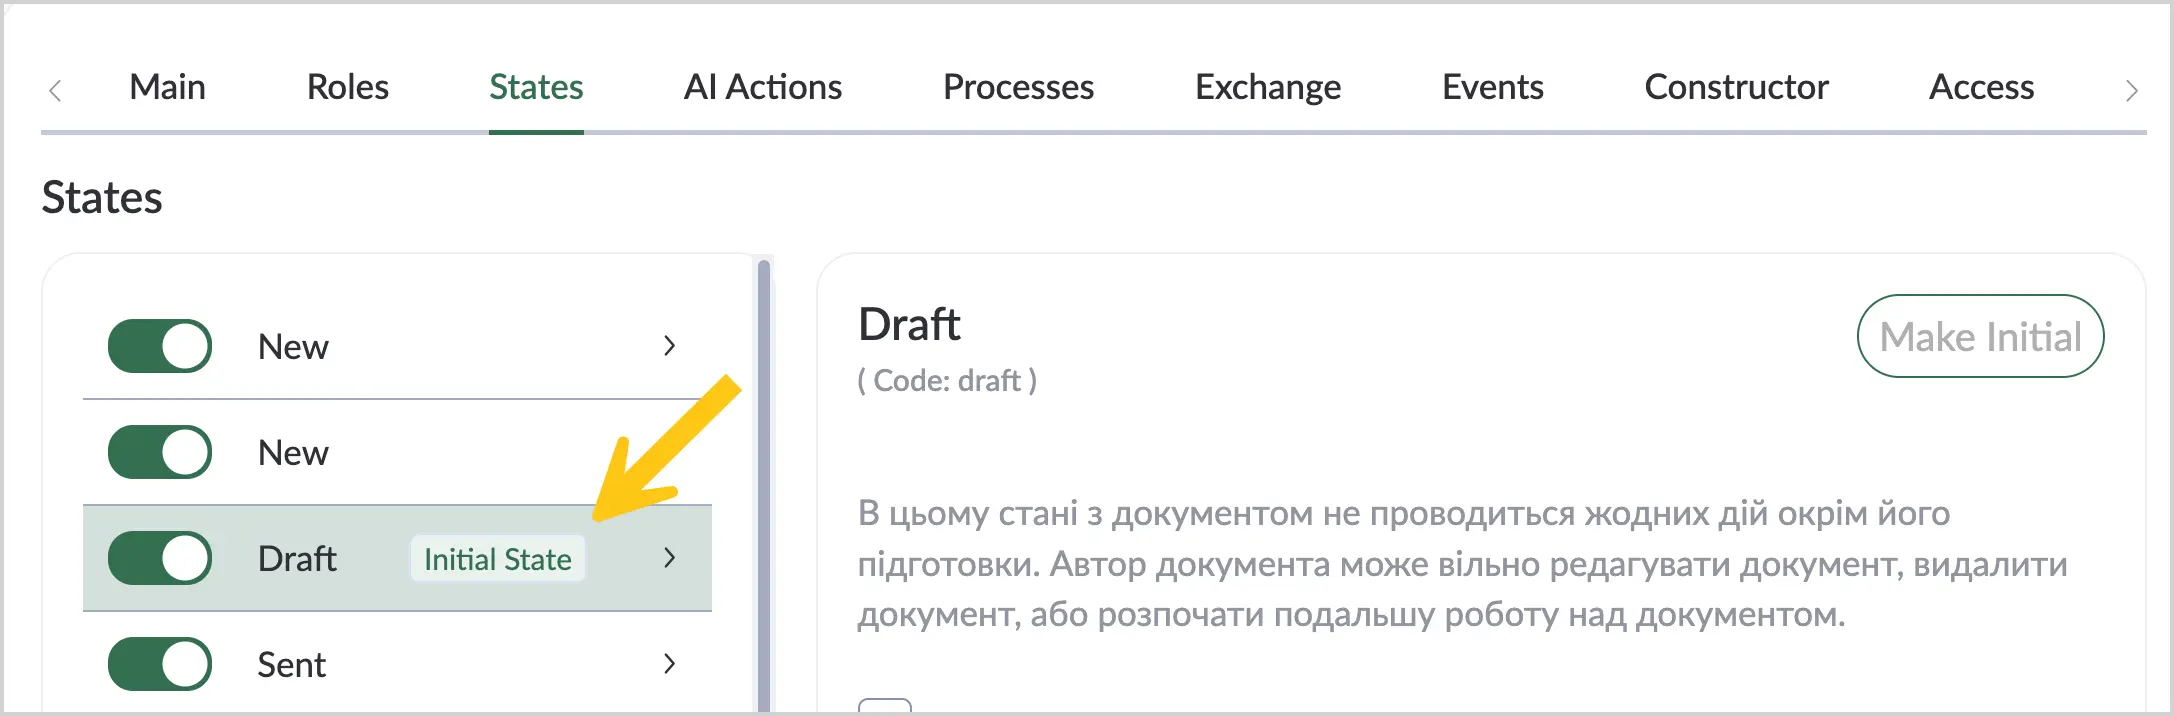
In the States menu, select the required state.
-
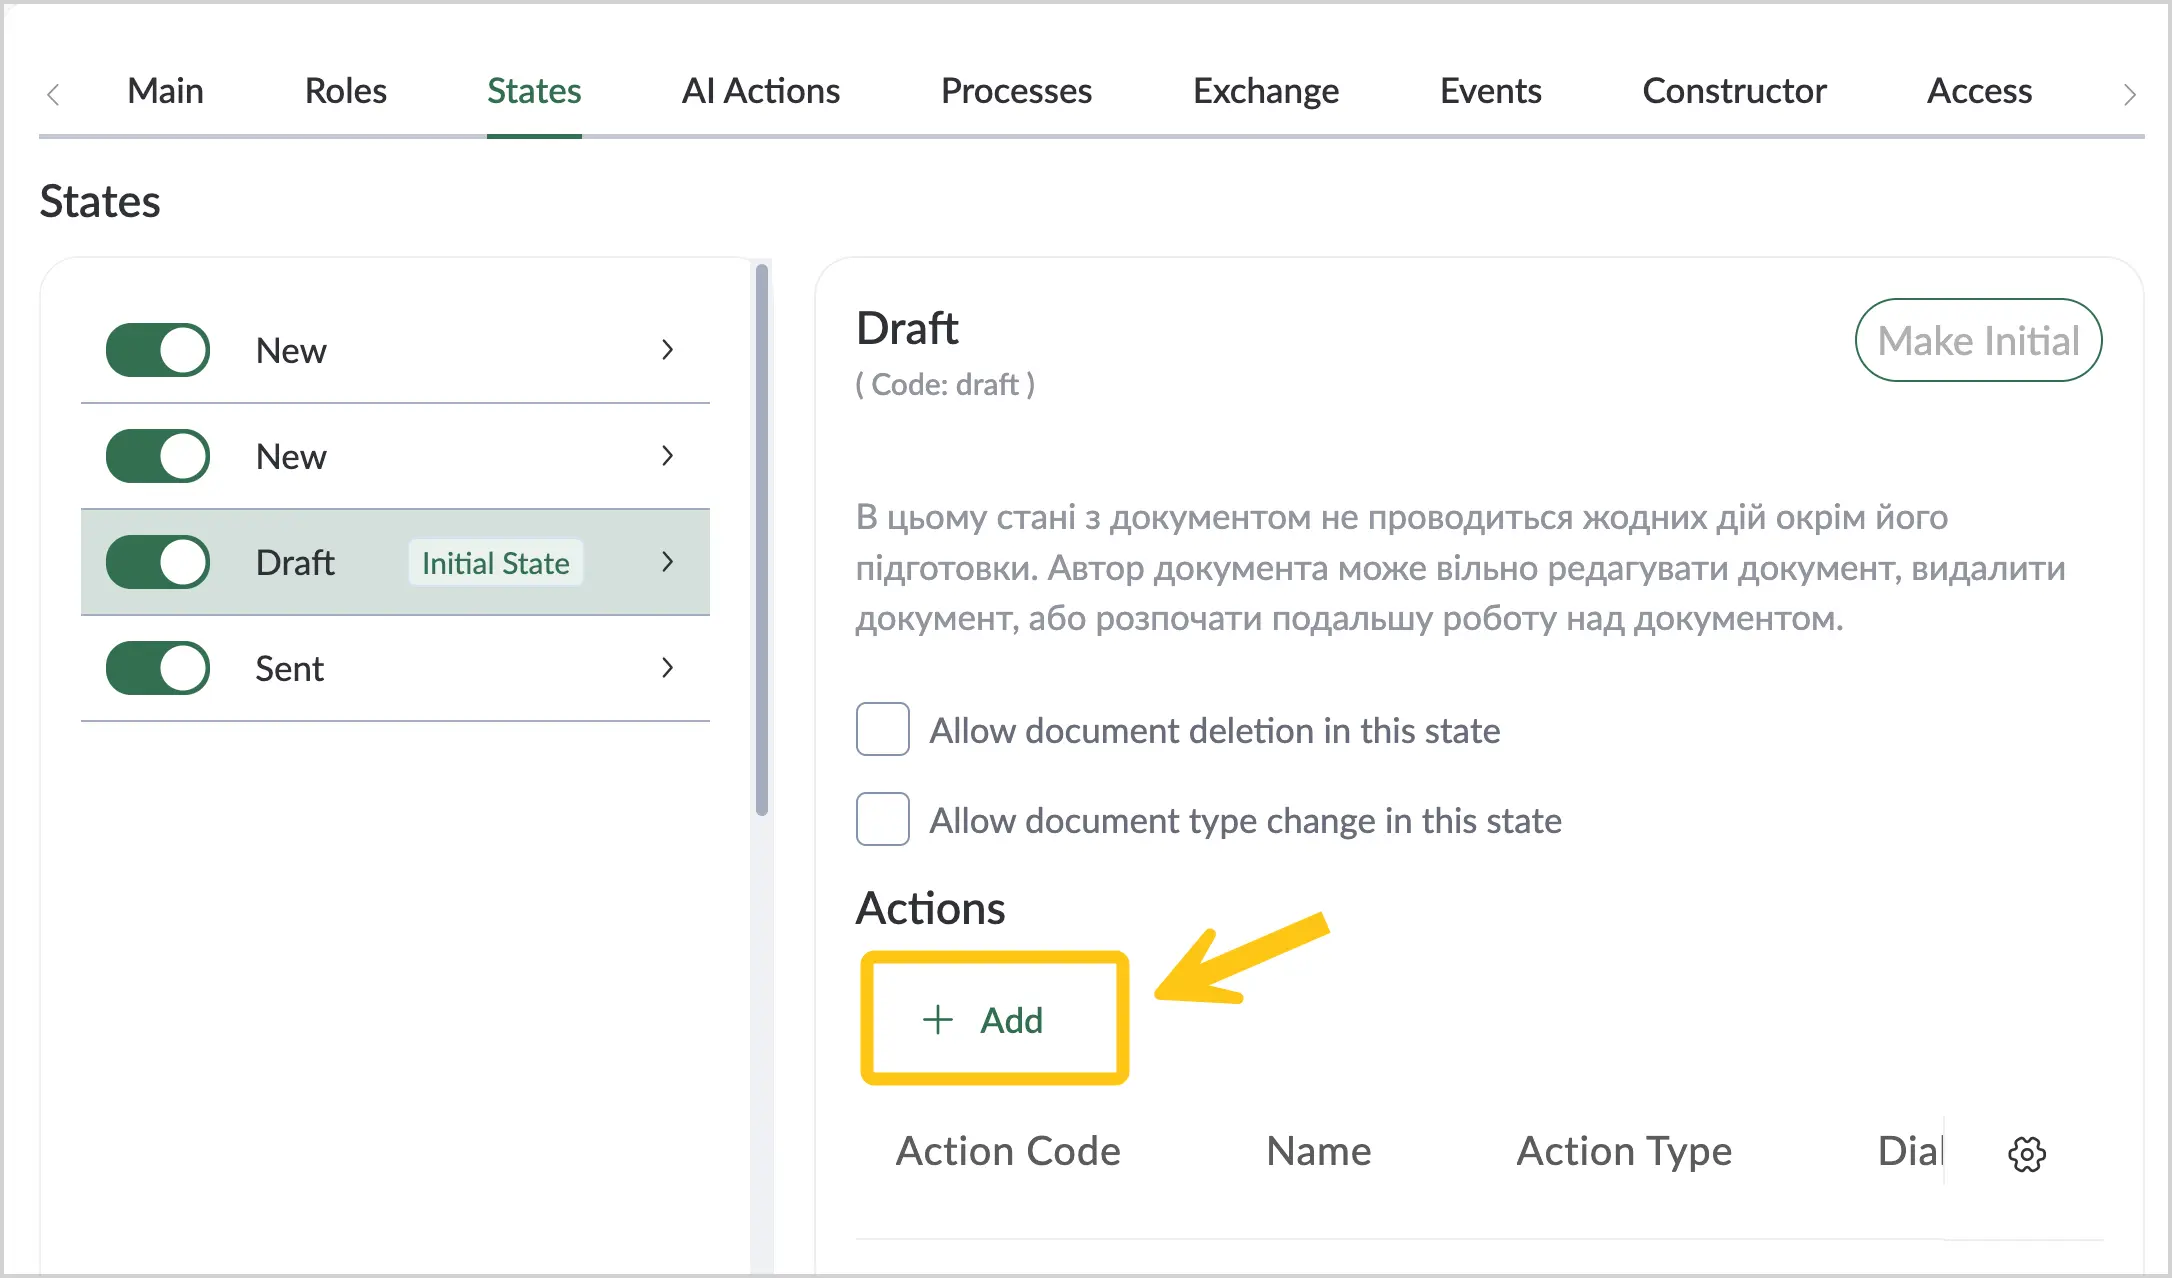
In the Actions table, select the Add 2 button.
-
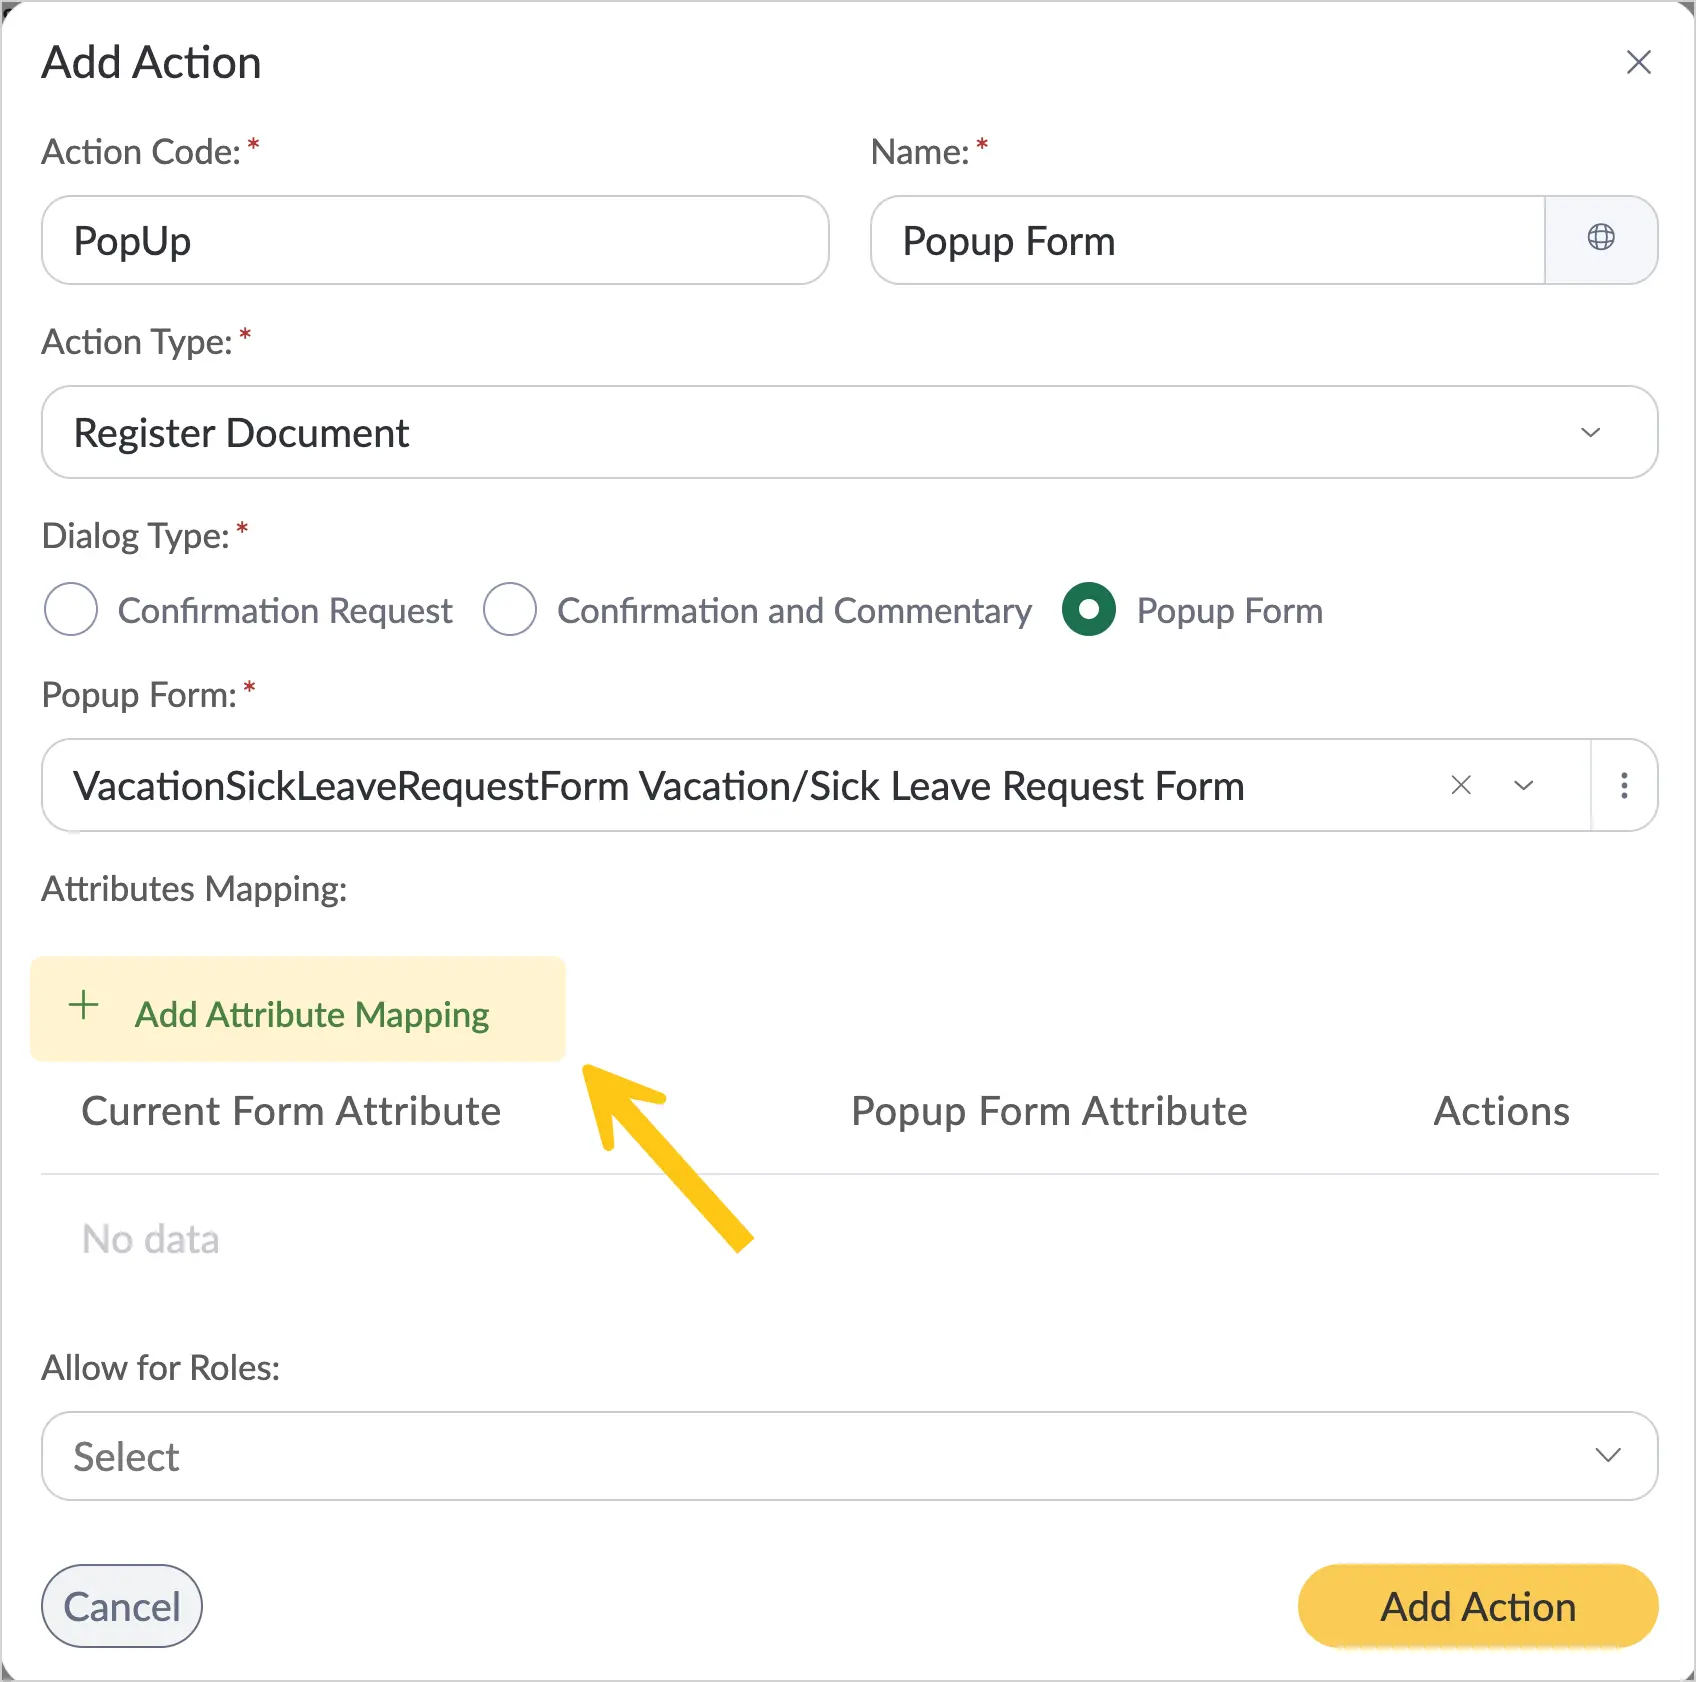
Fill in the fields using the hints in the table below.
| Field name | Description |
|---|---|
| Action code* | Unique identifier of the action. Must be unique within the same state. |
| Name* | The name of the action. ℹ️ Note: You can set an alternative name for different languages. To do this, in the Name field, select the icon and fill in the fields for other languages. Then select the Apply button. |
| Action type* | Select Register document. |
| Dialog type | Select Popup form. |
| Allow for roles | Grant permission to perform this action to roles activated in the document type (see the Roles section). |
Fields marked with "*" are required.
-
In the Attribute mapping section, select the Add Attribute Mapping button.
-
In the Attribute mapping window, in the Popup form attribute field, select the required attribute from the dropdown list.
-
In the Current form attribute 1 field, select the attribute from the current document type, task, or user dictionary form to map to the pop-up form attribute.
-
Using the checkboxes 2, configure the mapping direction:
-
Input Parameter — attributes from the document, task, or user dictionary are passed to the pop-up form.
-
Output Parameter — attributes from the pop-up form are passed to the document, task, or user dictionary.
-
Input + Output — attributes are passed in both directions.
- Select the Save button.
2.7.1.2.3. By Adding an Action to a Task Form
-
In the navigation panel, select the Studio 1 desktop.
-
Select the Forms and Templates 2 shortcut group, then select the Task Forms 3 shortcut.
-
Select the required task form 4.
-
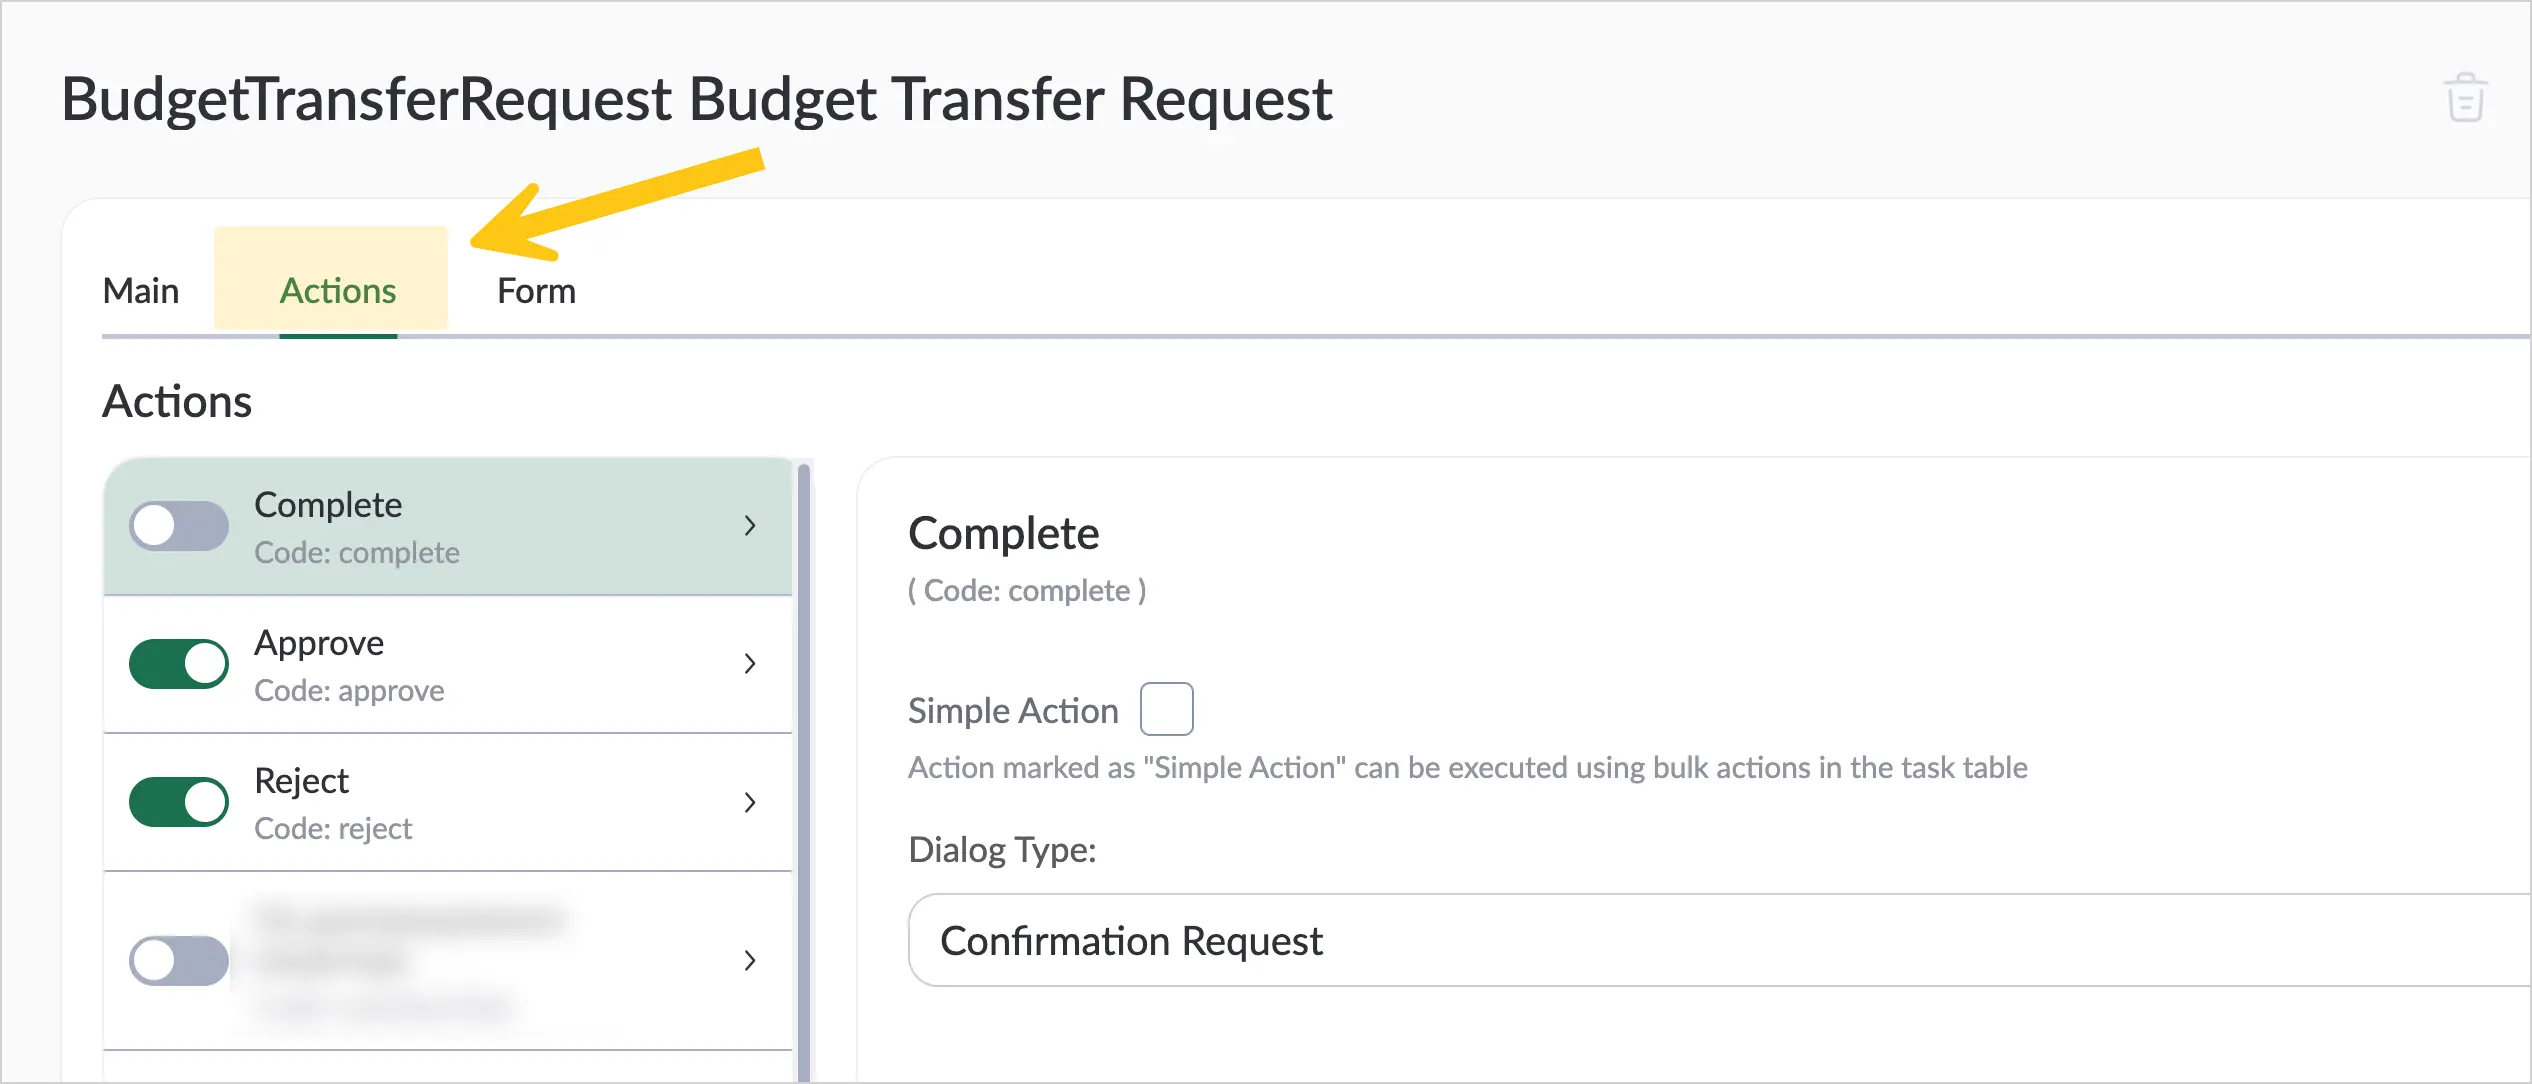
Go to the Actions tab.
-
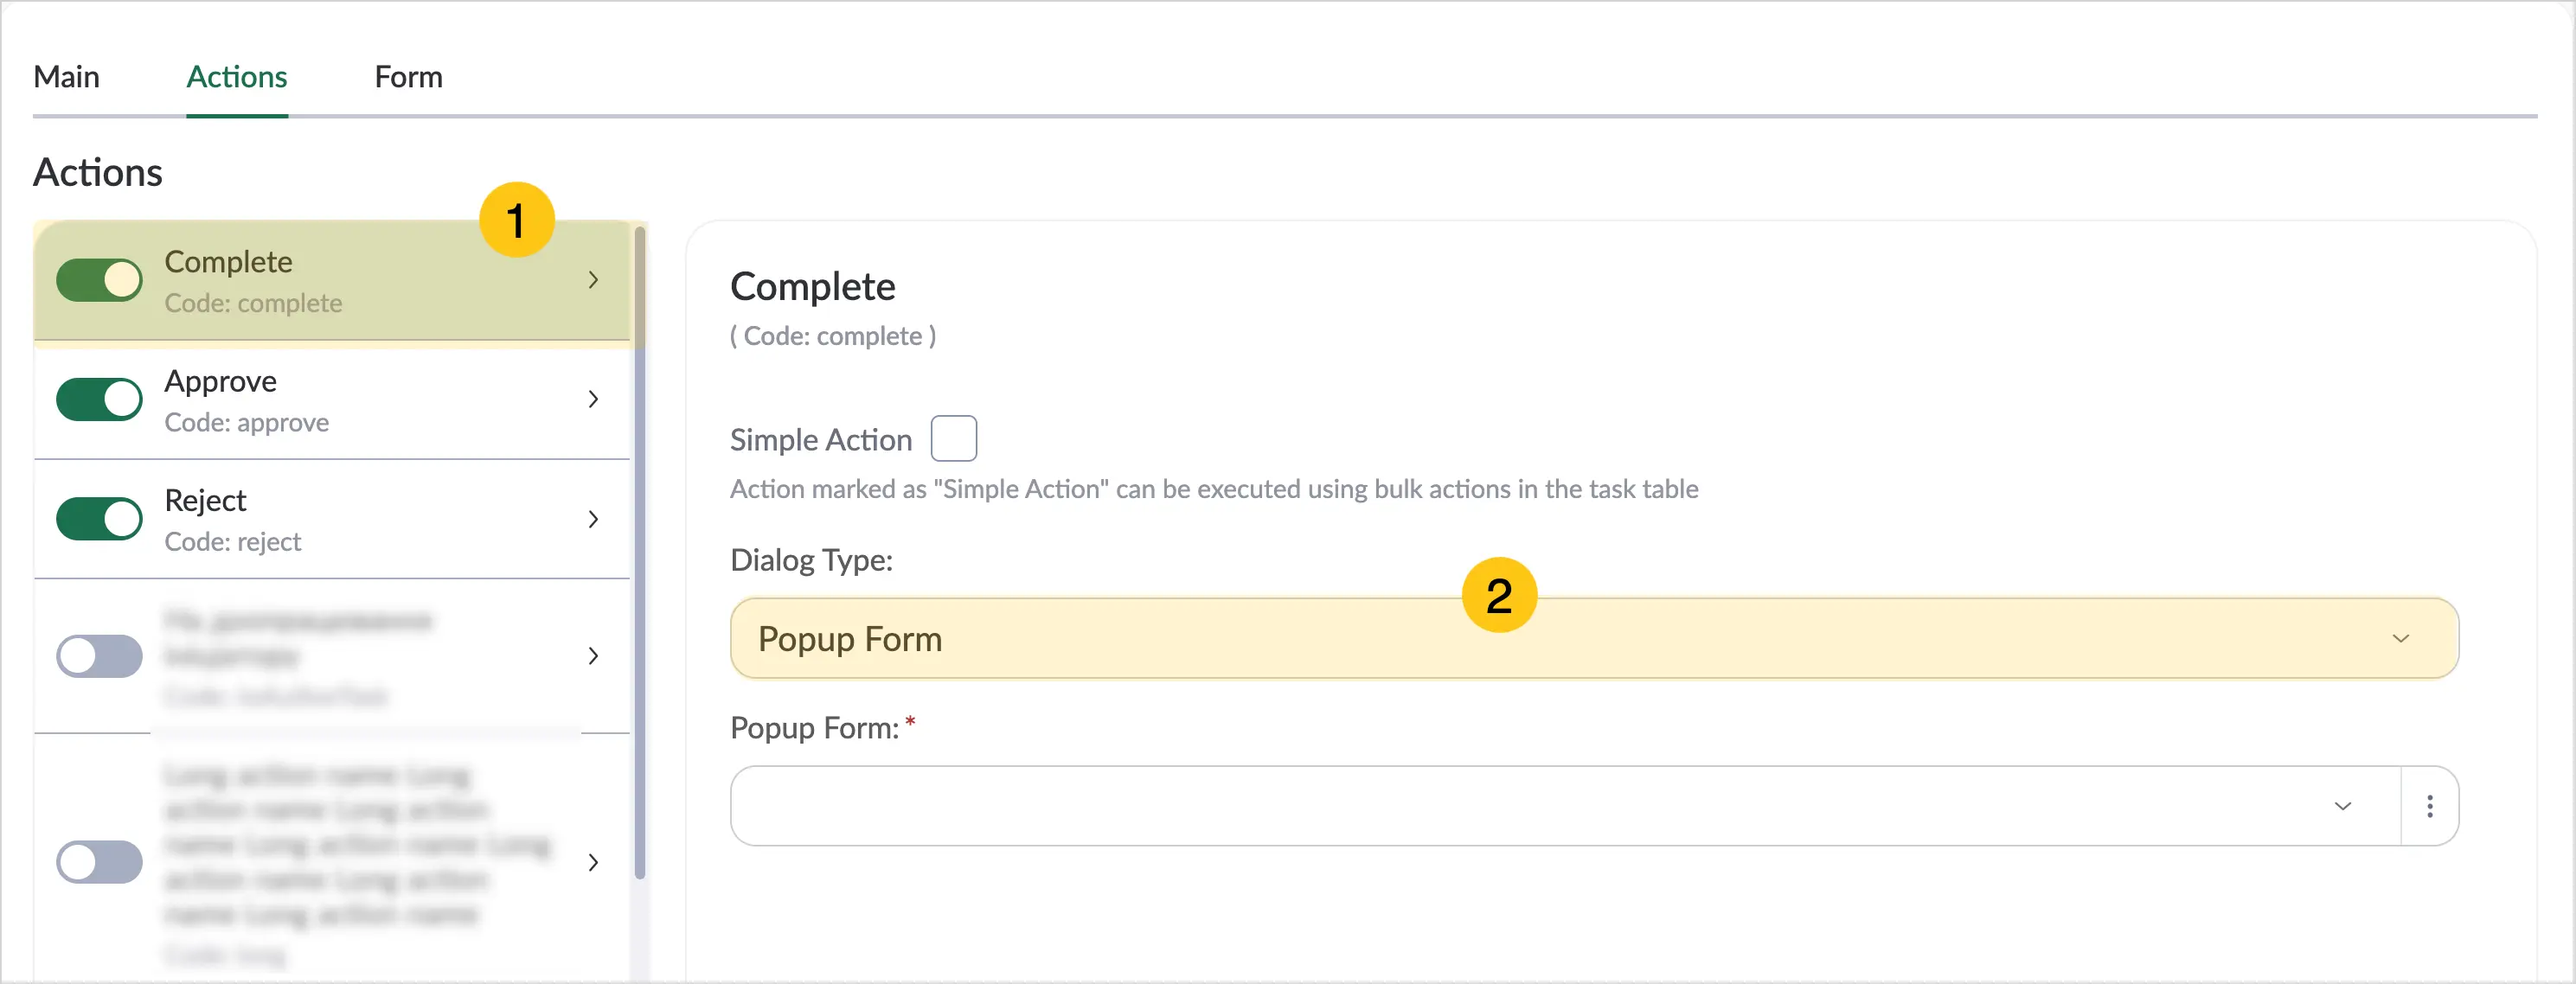
In the Actions menu, select the required action 1, then in the Dialog type field, select Popup form 2.
-
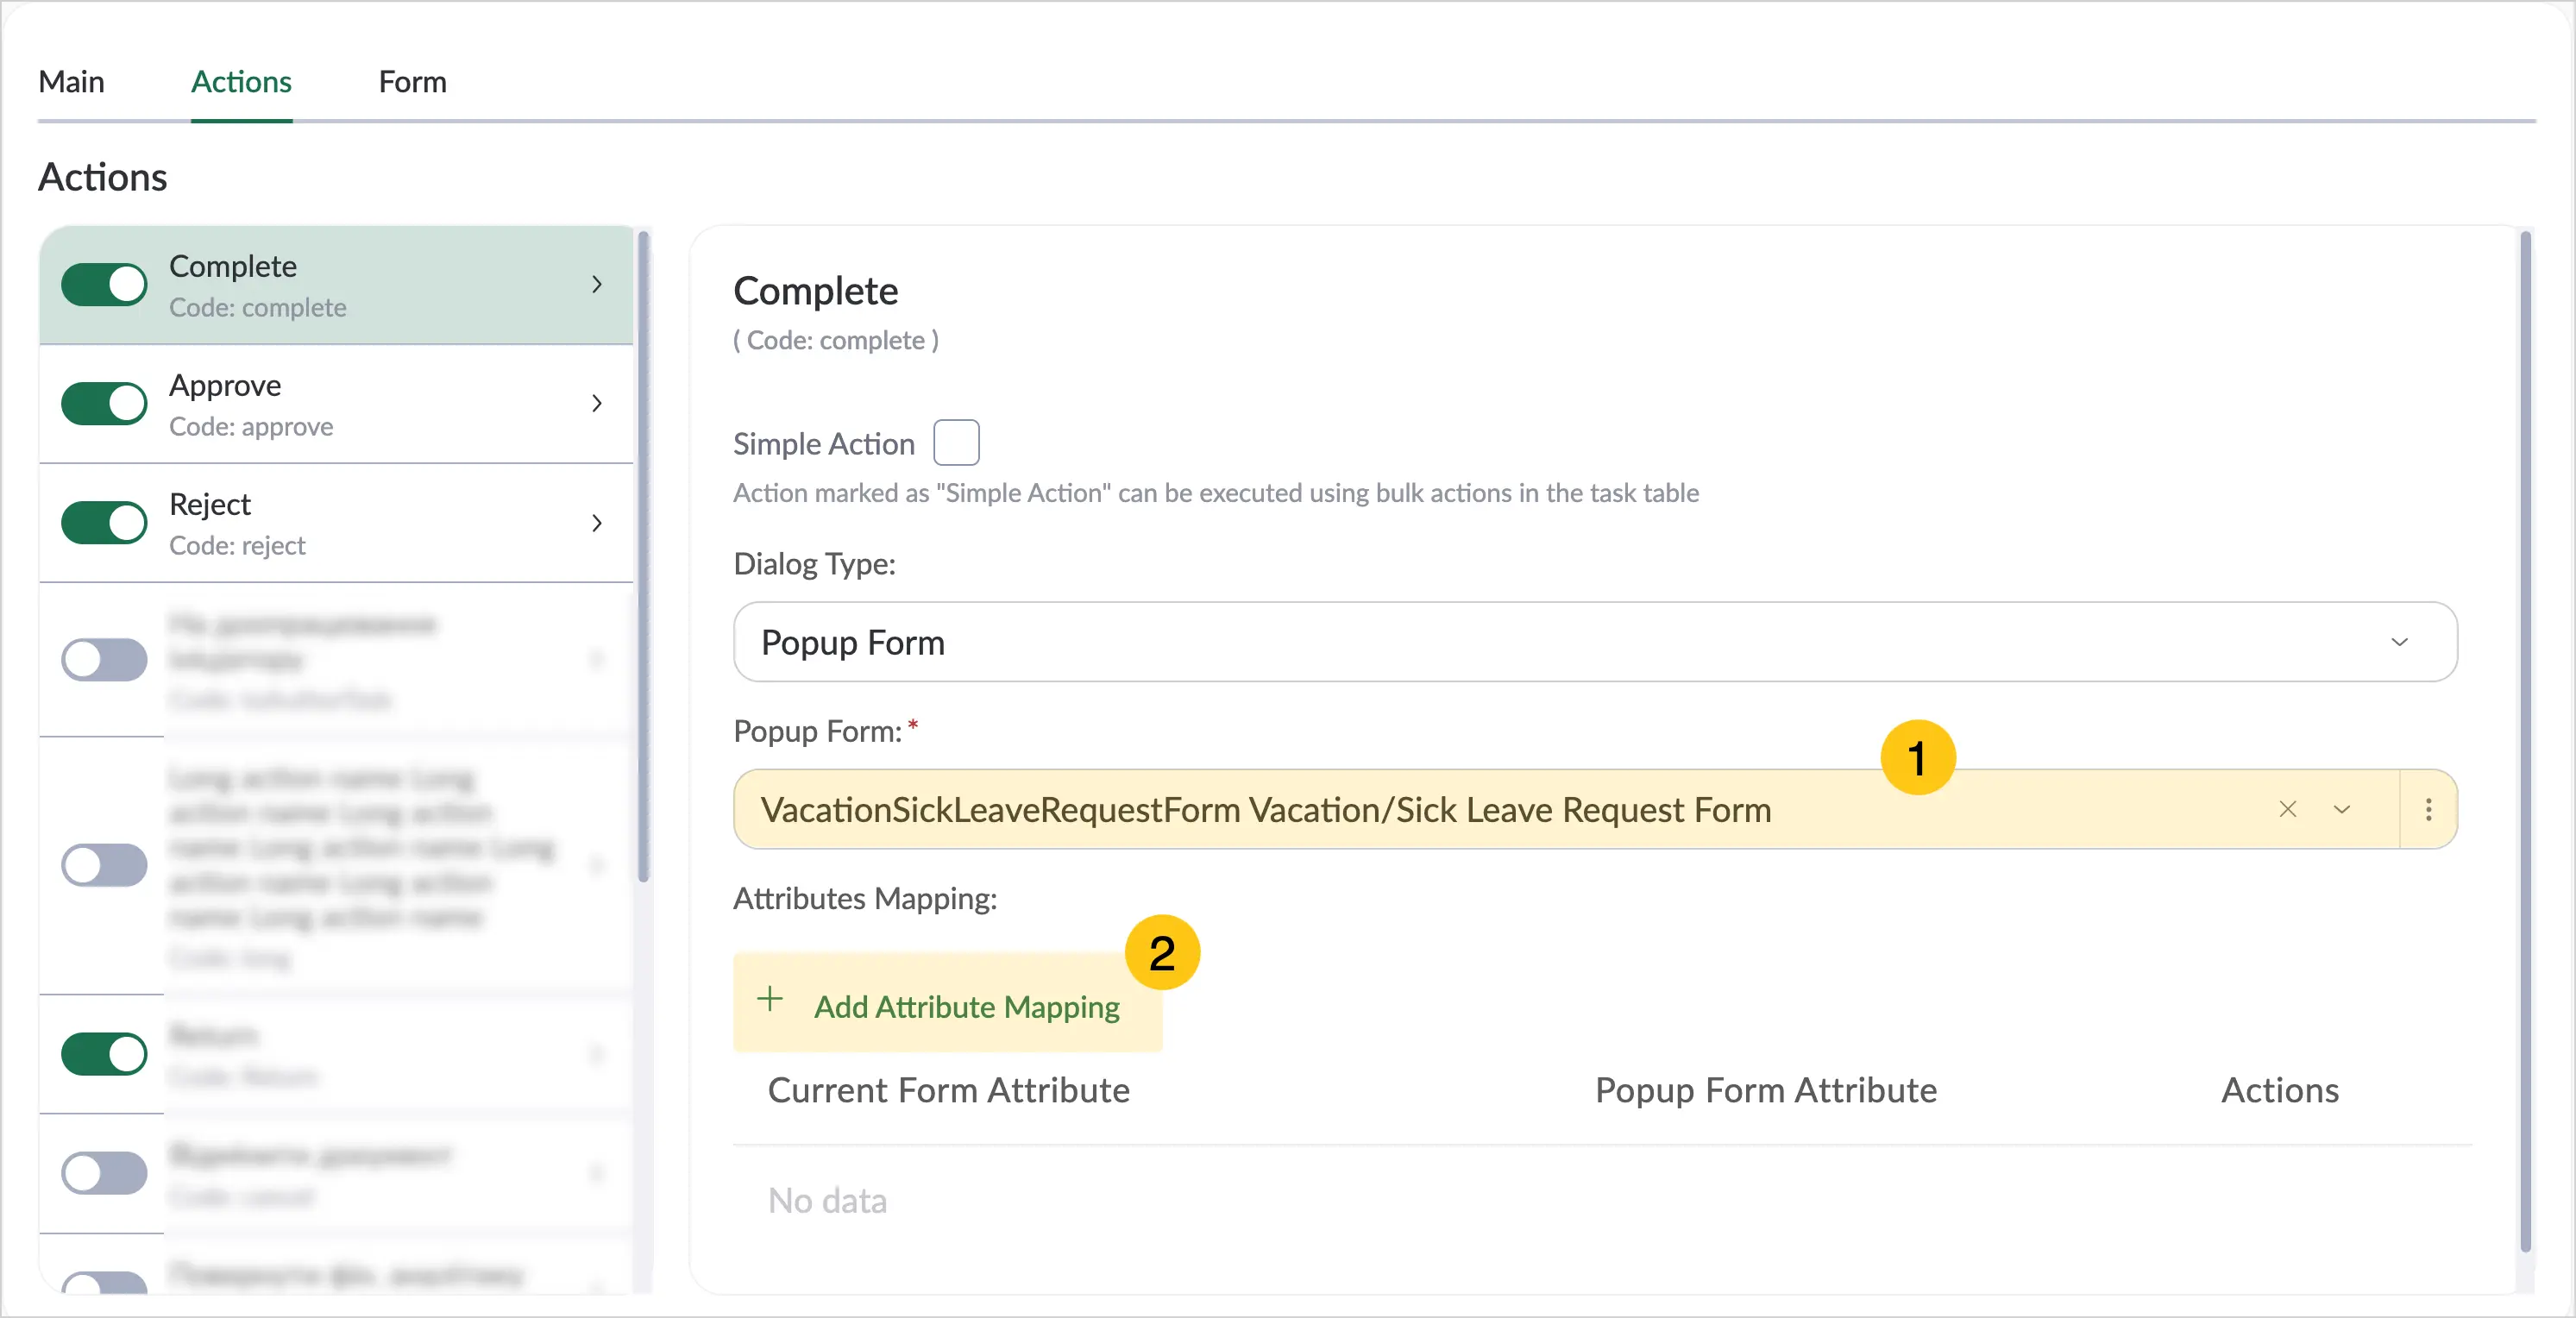
In the Popup form 1 field, select the required pop-up form from the dropdown list, then select the Add attribute mapping 2 button.
-
In the Attribute Mapping window, in the Popup Form Attribute field, select the required attribute from the dropdown list.
-
In the Current form attribute 1 field, select the attribute from the current document type, task, or user dictionary form to map to the pop-up form attribute.
-
Using the checkboxes 2, configure the mapping direction:
- Input Parameter — attributes from the document, task, or user dictionary are passed to the pop-up form.
- Output Parameter — attributes from the pop-up form are passed to the document, task, or user dictionary.
- Input + Output — attributes are passed in both directions.
-
Select the Save button.
2.7.1.2.4. Via the Script Module
A pop-up form can be triggered by the following events:
Button click on a document/task form or user dictionary:
async form_77_click(event) {
  // 77 — button ID

  const popupResult = await event.openPopupForm('f1', {
    // f1 — pop-up form code
    title: 'Form 1',
    // Form title
    height: '400px',
    // Form height; set to undefined to use the
    // value from the Form Designer settings
    width: '400px',
    // Form width; set to undefined to use the
    // value from the Form Designer settings
    attrValues: {
      attr1: event.document.getAttribute('attr2'),
      // attr1 placed on the form will receive the value
      // of attr2 from the document
    }
  })

  if (popupResult) {
    // When the user clicks "OK" on the form, the value of attr1
    // from the form will be set as the value of attr3 on the document
    const enteredValues = popupResult.attrValues
    event.document.setAttribute('attr3', enteredValues.attr1)
  }
}
When executing a document action:
async action_beforeExecute_d1(event) {
 // Trigger the form before executing action d1
 event.skipStandardConfirmDialog()
 // Cancel the standard confirmation dialog

 const popupResult = await showPopupForm('approveActionPopup', {
   // approveActionPopup — form code from the "Popup Forms" dictionary
   title: 'Approval result',
   // Form title
   height: undefined,
   // Height not set — will use the value from
   // the Form Designer settings
   width: undefined,
   // Width not set — will use the value from
   // the Form Designer settings
   attrValues: {
     additionalInfo: event.document.getAttribute('additionalInfo')
   }
 })

 if (!popupResult) {
   // If the user clicks "Cancel", do nothing
   event.cancelAction()
   return
 }

 const additionalInfo2 = popupResult.attrValues
 // When the user clicks "OK", write the form attribute value to the document
 event.document.setAttribute('additionalInfo', additionalInfo2.additionalInfo)
},
Before saving a document/task:
async beforeSave(event) {
 // Trigger the form before saving the document
 // event.skipStandardConfirmDialog() // Cancel the standard confirmation dialog

 const popupResult5 = await showPopupForm('f5', {
   title: 'Duplicate check',
   height: undefined,
   width: undefined,
   attrValues: {
     sd01: event.document.getNativeAttribute('subject'),
     sd06: event.document.getAttribute('sd06'),
   }
 })

 if (!popupResult5) {
   event.cancelSave()
   return
 }

 const additionalInfo3 = popupResult5.attrValues
 event.document.setNativeAttribute('subject', additionalInfo3.sd01)
 event.document.setAttribute('sd06', additionalInfo3.sd06)
}